Why Vinyl Wraps Are a Smart Choice for Pop-Up Retail Spaces
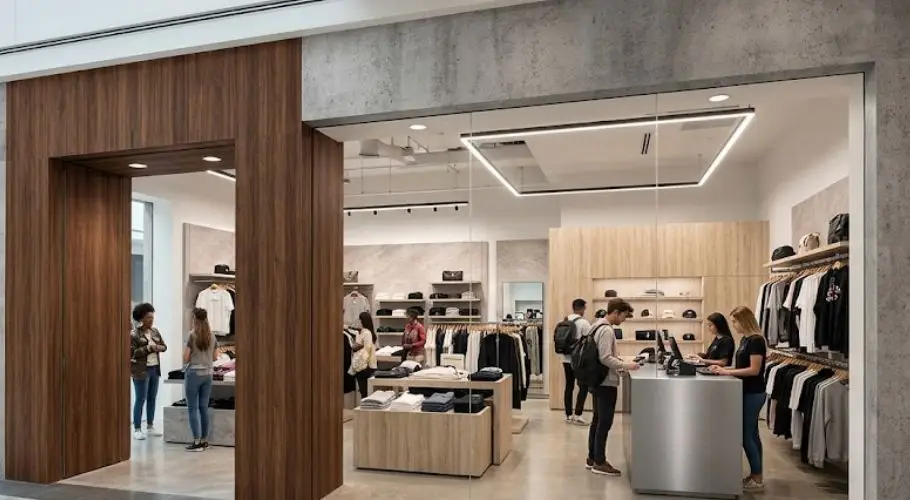
Pop-up retail moves fast. Brands set up at malls, trade shows, street markets, and festivals for a few days or a few weeks, then pack up and leave. The timeline is short. The budget is tighter than a permanent store. But the space still needs to look good, or people just walk past. That’s the problem most pop-up operators run into. They can’t paint. They can’t renovate. They’re working with whatever the venue gives them, usually plain walls, generic doors, and surfaces that were not designed with their brand in mind. Vinyl wraps solve that without causing any damage or running up a big bill. A Film, Not a Sticker A lot of people hear “vinyl wrap” and picture a large sticker. That’s not what architectural vinyl film is. The films used in commercial spaces, brands like 3M DI-NOC, LG Benif, Belbien, and Reatec, are pressure-sensitive surface films with a self-adhesive backing. They go on smooth surfaces like walls, doors, columns, and counters and change the entire look of that surface. The finishes are not flat printed graphics. They replicate the texture and appearance of real materials. Wood grain that has depth to it. Stone that looks heavy even though it weighs nothing. Brushed metal without any actual metal. These films are fire-rated, abrasion-resistant, and built for environments where people are moving through all day. A certified installer applies them directly over existing surfaces with no demolition, no permits, and very little downtime. That’s a real difference from what most people picture when they think of a wrap. Why Pop-Up Spaces Are Harder Than They Look Running a pop-up is not the same as opening a regular store. You’re renting a space someone else owns. You often sign a short lease, sometimes just a few days, sometimes a month. The landlord or venue coordinator usually has rules. No painting. No drilling through walls. No changes to the storefront exterior without approval. So you’re stuck with what you get. And what you usually get is a blank box with fluorescent lighting and scuffed surfaces. That is a hard starting point for any brand trying to make a real impression. Pop-up shoppers decide whether to walk in within a few seconds of passing the entrance. If the space looks bare or unfinished, most of them keep going. The visual experience of the space does real work, especially when there’s no established reputation or foot traffic coming from repeat customers. Key Benefits of Vinyl Wraps for Pop-Up Spaces 1. Installation Takes Hours, Not Days There is no drying time with vinyl wraps. No fumes. No waiting for anything to cure. An installer comes in, preps the surfaces, and applies the film. A door takes around 30 minutes. A wall or a set of columns can take a few hours. A small pop-up space with multiple surfaces can usually be done in a single day. That matters a lot when your setup window is a weekend and your pop-up opens Monday morning. 2. The Surface Underneath Stays Untouched Architectural vinyl wraps go over existing surfaces and come off without damage. When your lease ends, the installer removes the film and the wall, door, or counter underneath is exactly as it was. No scraping. No repainting. No security deposit disputes with the venue. This is one reason venue managers and property owners have no issue with wraps. There’s nothing to fix afterward. 3. Over 1,000 Finish Options The range is genuinely wide. Wood grains, stone textures, metallic finishes, solid mattes, high gloss, concrete looks, leather effects. Brands like 3M DI-NOC, Belbien, LG Benif, and Reatec each carry hundreds of options. Put them together and you’re looking at more than 1,000 choices. That means a jewelry brand, a streetwear label, and a plant-based food company can all use vinyl wraps and end up with completely different looks. The material adapts to the brand, not the other way around. 4. Costs Less Than Any Other Renovation Option Hiring contractors, buying new materials, replacing surfaces, it adds up fast. And it makes no sense for a space you’re using for two weeks. Vinyl wraps cost a fraction of what a renovation costs and they deliver a result that looks just as considered. Door replacement can run into thousands of dollars per door. A door wrap covers the same door in about 30 minutes at a much lower cost and the door still looks completely different when it’s done. 5. Looks Like It Was Designed That Way A wrapped column or wall does not look like a temporary fix. When the film is applied by a certified installer with clean seams and proper surface prep, the result reads as a deliberate design choice. A wall with a concrete-textured film looks like a concrete wall. A counter wrapped in dark wood grain looks like it was built that way. That’s the kind of thing that stops people at the entrance and brings them in. 6. Goes on Multiple Surfaces in One Space Pop-up retail works best when the whole space feels put together. A storefront wrap on the entry panels sets the tone before anyone steps inside. Wall wraps carry the look through the interior. Wrapped counters and casework tie everything together. You can do the whole space in one installation visit instead of coordinating different contractors for different surfaces. Vinyl Wraps vs. Other Pop-Up Setup Options Feature Vinyl Wraps Paint Temporary Decals Full Renovation Installation Time Hours 1–3 days + drying Hours Days to weeks Removable Without Damage Yes No Partially No Finish Quality Realistic, textured Flat or glossy Printed graphic High Cost Low to moderate Low Very low Very high Finish Variety 1,000+ options Limited colors Print only Unlimited but slow Works for Short-Term Leases Yes Not ideal Partially No Permits Required No Sometimes No Usually yes Surfaces You Can Wrap in a Pop-Up Store Architectural vinyl films work on smooth, non-porous surfaces. In a retail space, that covers quite a lot: Walls and panels – Backdrop
Wood Grain vs Metallic Vinyl Wrap Finishes: A Commercial Design Guide
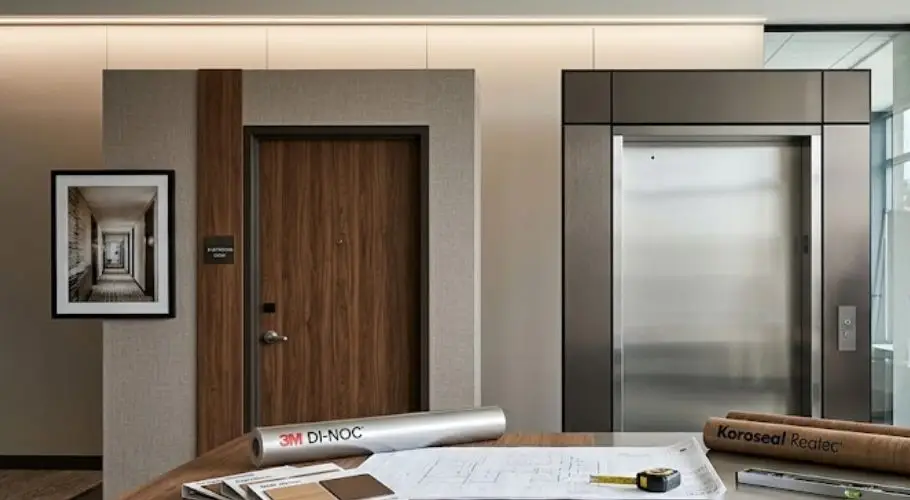
Picking a finish for a commercial renovation comes down to more than just what looks good. The finish you choose affects how a space feels to the people who use it every day, how much upkeep it needs, and whether it will still work with the rest of the building’s design in five years. Wood grain and metallic are two of the most common architectural vinyl wrap finishes used in commercial settings, and they pull in very different directions. Both are available through the same film manufacturers, both go onto the same surfaces, and both last about the same length of time with proper care. But they suit different spaces, different industries, and different design goals. This blog covers the key differences between wood grain and metallic architectural vinyl wrap so you can make a better call before your next project. What Are Wood Grain and Metallic Architectural Vinyl Wraps? Architectural vinyl wrap is a pressure-sensitive adhesive film applied directly to existing surfaces like doors, elevator panels, walls, columns, and casework. It sticks to smooth, non-porous surfaces including aluminum, gypsum board, stainless steel, and glass. The film replaces the visual surface of whatever it’s applied to without any demolition or structural work. Wood grain and metallic are two of the most widely used finish categories within architectural vinyl. Wood grain film is printed and embossed to replicate the texture and tone of real timber, from light oak and maple to dark walnut and wenge. Metallic film mimics the look of brushed steel, stainless steel, chrome, or other metal finishes with varying degrees of sheen. Both categories are available from manufacturers like 3M DI-NOC, LG Benif, Koroseal Reatec, and Belbien, and both come in fire-rated versions suitable for commercial and public buildings. Wood Grain Architectural Vinyl Wrap Wood grain wrap is one of the most used finishes in hospitality, healthcare, and office renovation. It brings warmth into a space in a way that most other finishes don’t. There’s a reason hotels use it on corridor doors and elevator cab walls. It makes a space feel less like a building and more like somewhere people actually want to be. That quality is hard to get from paint or a plain solid finish, and it’s why wood grain stays one of the first choices property managers reach for. Where It Works Best Hotel room doors and corridor walls Elevator cab interiors in hospitality and boutique office buildings Reception desks and lobby feature walls Healthcare facilities that need a calming, non-clinical feel University and education environments Restaurants and hospitality spaces Visual Character Wood grain wrap adds warmth and texture to a room. The grain patterns introduce visual movement without being loud. Light wood tones like oak or maple keep a space feeling open and fresh. Darker tones like walnut or wenge feel more grounded and formal. Both sit naturally alongside neutral wall colors, stone flooring, and leather or fabric furnishings. Wood grain also works across different lighting conditions, which makes it a reliable choice in spaces where natural light varies through the day. Practical Advantages of Wood Grain Wood grain film is forgiving in high-contact areas. The texture and color variation in the pattern means minor marks and fingerprints are less visible than on a smooth, reflective finish. This makes it a practical option for hotel doors and elevator interiors where surfaces get touched constantly. It also tends to show its age more gradually than a metallic finish. A metallic wrap can look sharp when new but will highlight wear or uneven cleaning over time. Wood grain holds its appearance between cleans better, which matters in commercial settings where surfaces may not get wiped down every day. Metallic Architectural Vinyl Wrap Metallic architectural vinyl wrap covers a range of finishes from brushed stainless steel and satin chrome to darker gunmetal and bronze. The look is clean and precise, and it fits naturally in modern commercial buildings. It’s the finish you see on elevator panels in corporate towers, on reception counters in financial services offices, and on storefront frames in high-end retail. When a building wants to project a sharp, professional image, metallic is usually the first finish that comes up. Where It Works Best Elevator cabs and landing doors in corporate and mixed-use buildings Storefronts and exterior facade panels Reception and lobby surfaces in corporate offices Retail environments with a modern or luxury positioning Healthcare facilities with a clinical, high-hygiene aesthetic Spaces where an existing stainless steel or metal finish needs updating Visual Character Metallic wrap has a reflective quality that makes a space feel sharper. Brushed finishes are the most common choice in commercial settings because they look professional without being overly shiny or difficult to maintain. The finish looks sleek and deliberate. It works well alongside glass, dark flooring, and minimal furnishings. It can feel cold in spaces that lack other warm elements, which is worth keeping in mind if the rest of the interior is already quite neutral or sparse. In those cases, pairing metallic panels with warmer flooring or furnishings usually balances it out. Practical Considerations for Metallic Metallic finishes show fingerprints, smudges, and streaks more than wood grain. In high-traffic areas like elevator doors or reception surfaces that get touched frequently, you will need to clean them more regularly to keep them looking right. Brushed metallic finishes handle this better than polished or chrome finishes, where every mark shows immediately. Architectural vinyl is easy enough to clean. A damp cloth or mild cleaning solution handles most marks without damaging the surface. In settings where cleaning happens daily anyway, the extra upkeep on metallic is less of an issue. Wood Grain vs Metallic Architectural Vinyl Wrap: Side-by-Side Comparison Feature Wood Grain Wrap Metallic Wrap Aesthetic Warm, natural, textured Sleek, modern, reflective Feel of the space Welcoming, residential quality Professional, corporate edge Best lighting Works in most lighting conditions Looks sharp in well-lit, open spaces Maintenance Hides marks better, less frequent cleaning Shows fingerprints more, needs regular wiping Pairs well
Removing Adhesive Residue After Vinyl Wrap Removal: The Right Way
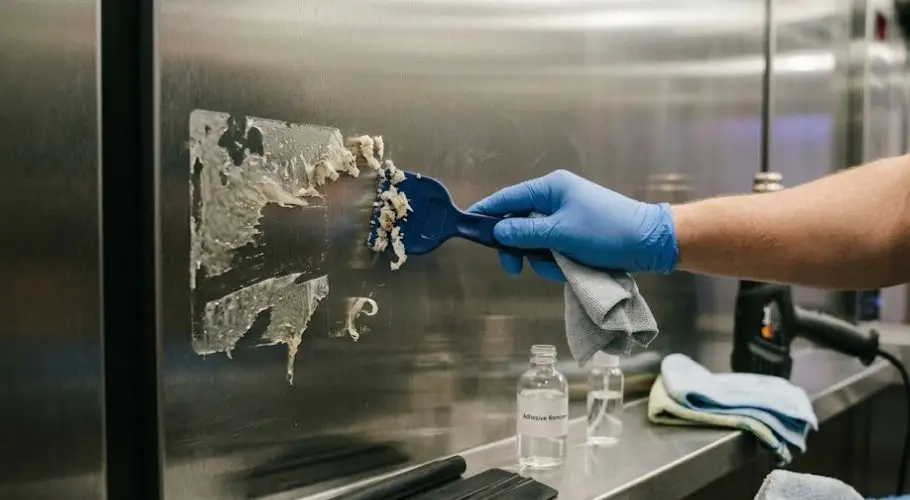
Removing vinyl wrap is only half the job. Once the film is off, you are often left with sticky residue on the surface underneath. It catches light, collects dust, and gets worse the longer you leave it. Handle it the wrong way and you can scratch or dull the surface you were trying to protect. This guide walks through how to clean adhesive residue off architectural surfaces. Doors, wall panels, elevator cabs, storefront frames, it does not really matter. The method is mostly the same across all of them. Go slow, use the right products, and do not try to rush it. Why Adhesive Residue Gets Left Behind Pressure-sensitive adhesive bonds to a surface when you press it down. Over months and years, heat and pressure work that glue deeper into the material. When you pull the film off, some of that adhesive stays put. Old wraps are the worst for this. The glue dries out and hardens over time, so it grips the surface more tightly. Rough or textured substrates are also a problem because the adhesive gets into small grooves and pores. The longer a wrap has been on, the more patience you will need to remove what it leaves behind. Surfaces Where Adhesive Residue Is Most Common Surface Type Residue Risk Notes Painted metal (doors, panels) Medium Clean with care to avoid paint damage Stainless steel Low to Medium Usually easier to clean Glass Low Responds well to most adhesive removers Powder-coated surfaces Medium to High Avoid harsh solvents Laminate or MDF High Absorbs adhesive; needs gentle approach Gypsum / drywall High Very sensitive; low-moisture methods only What You Will Need Get your tools together before you start. Using the wrong thing can scratch the surface or just push the residue around without actually removing it. Cleaning supplies: Isopropyl alcohol (70% or higher) Citrus-based adhesive remover or naphtha Plastic scraper or plastic razor blade Microfibre cloths (several clean ones) Mild dish soap and warm water Soft-bristle brush for textured surfaces Optional: Heat gun or hair dryer Rubbing compound for painted surfaces Gloves and ventilation (when using solvents) Avoid steel wool, metal scrapers, or abrasive pads. These leave scratches that are harder to fix than a little leftover glue. Step-by-Step: How to Remove Adhesive Residue the Right Way Step 1: Start With Heat Warm adhesive comes off much easier than cold adhesive. Use a heat gun or hair dryer on a low to medium setting. Keep it moving and hold it a few inches from the surface. You are not trying to burn anything. You just want the glue to go soft enough to peel. This matters most on metal doors and elevator panels where the adhesive has been sitting under pressure for years. If you are working on a painted or powder-coated surface, do not overdo the heat. Too much and you risk bubbling or lifting the coating underneath. Step 2: Lift with a Plastic Scraper While the adhesive is still warm, use a plastic scraper or your fingernail to start lifting it. Keep the angle low, around 30 to 45 degrees. That reduces the risk of gouging the surface. Work in small sections. Do not try to scrape large areas in one go. Metal blades are off the table on painted, coated, or laminate surfaces. Even a light scratch shows up once the surface dries. Plastic razor blades are cheap and available at most hardware stores. Worth keeping a few on hand. Step 3: Apply Your Adhesive Remover Put a small amount of isopropyl alcohol or citrus-based remover onto a microfibre cloth. Do not pour it straight onto the surface. Press the cloth down onto the residue and leave it there for 30 to 60 seconds. The solvent needs a moment to work into the adhesive before you start wiping. Then wipe in one direction. Going in circles spreads the residue around. After each pass, fold the cloth to a clean section and reapply solvent as needed. On stainless steel elevator panels, this step alone usually takes care of most of the residue. Step 4: Clean the Surface When the residue is gone, wash the surface down with mild dish soap and warm water. This gets rid of any solvent or oily film the remover left behind. Dry it off with a clean microfibre cloth. If the plan is to put new film on, do not skip this step. Any contamination left on the surface will affect how well the new vinyl sticks. That applies whether you are replacing door wraps after years of use or refreshing part of a wrapped wall. Step 5: Inspect and Treat Any Remaining Spots Check the surface under good lighting before you call it done. Residue is easy to miss until it catches the light at an angle. A second pass with isopropyl alcohol will sort out any stubborn patches. On painted surfaces, look for any dull or hazy patches where the adhesive was sitting. A bit of rubbing compound worked in gently and then buffed off can bring the finish back. Common Mistakes to Avoid Using too much solvent at once: More does not mean faster. Excess solvent can seep under trim, lift coatings, or leave streaks. Use just enough to wet the residue. Skipping heat on old wraps: If the film has been on for several years, the adhesive will have gone hard. Trying to remove it cold takes ages and is more likely to scratch the surface underneath. Scrubbing too hard: Pressing down hard while scrubbing leaves swirl marks, especially on painted or coated surfaces. Light pressure and patience gets better results every time. Using the wrong solvent: Acetone is too harsh for most painted, powder-coated, or plastic surfaces. Isopropyl alcohol or a citrus remover is the safer choice for most jobs. Always test a hidden spot first before going over the whole surface. Not rinsing off the solvent: Finish with soap and water every time. Leaving solvent residue on the surface creates a film that
How Do You Safely Remove Stains from Vinyl Wrap?
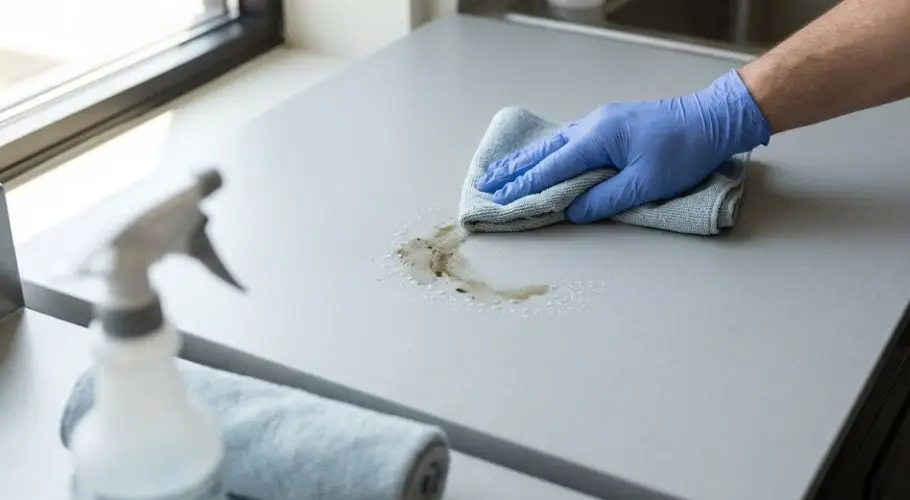
Vinyl wrap picks up stains. Grease builds up near stoves. Ink lands on wrapped office furniture. Water spots show up around sinks. It happens in every space, residential or commercial. Most people either scrub too hard or grab the wrong cleaner. Both choices can cause more damage than the stain itself. The right approach is simple once you know it. You don’t need a lot of products. You just need to use them in the right order with the right amount of pressure. This guide covers everything from everyday grime to the tougher stuff, so your vinyl surfaces stay clean without getting wrecked in the process. Why Vinyl Wrap Reacts Badly to the Wrong Cleaner Vinyl wrap is not paint. It’s not tile either. It’s a thin, flexible film bonded to a surface with pressure-sensitive adhesive. That structure makes it durable, but it also makes it sensitive to heat and harsh chemicals. A cleaner that’s too acidic or too alkaline breaks down the film’s outer coating. Rough scrubbing leaves scratches you can’t fix. Steam or hot water warps the material and loosens the bond at the edges. People usually don’t notice the damage right away. By the time they do, the film is already dull, cracked, or peeling. Replacing a section of vinyl wrap costs more than a gentle cleaner ever would, so it’s worth getting this right from the start. What Causes Stains on Vinyl Wrap Not all stains are the same. Knowing what you’re dealing with helps you pick the right treatment and skip the ones that won’t work. These are the most common stains that show up on commercial and residential vinyl wraps: Grease and cooking oil around stovetops, range hoods, and kitchen walls Ink and permanent marker on wrapped desks, doors, and furniture Hard water spots in bathrooms, laundry rooms, and near sinks Adhesive residue left behind by tape, labels, or stickers Dust and surface grime on wall panels and feature surfaces Coffee, food, and drink spills that dry and harden if left too long Fresh stains lift off much easier than old ones. A spill you catch in the first few minutes might wipe up with just a damp cloth. The same spill left overnight needs more work. So wiping things down quickly is the easiest thing you can do for vinyl wrap maintenance. What to Have Ready Before You Clean You don’t need a lot. Most of what works on vinyl wrap is already in most homes or easy to find at a hardware store. Here’s what to keep on hand: Warm water Mild dish soap or a pH-neutral vinyl cleaner Isopropyl alcohol, 70% concentration Two or three clean microfiber cloths A soft sponge A spray bottle Skip the paper towels. They feel soft, but they’re rougher than microfiber and can leave faint scratches on matte or satin finishes. Microfiber is gentler and picks up dirt better. Keep a few cloths set aside just for your wrapped surfaces so you’re not grabbing something that’s been used on tougher jobs. How to Remove Stains from Vinyl Wrap, Step by Step Start with Warm Soapy Water This works on most everyday stains. Mix a small amount of mild dish soap into warm water. Dampen a microfiber cloth, wring it out until it’s just damp, and wipe the stained area using slow, even strokes. Don’t press hard. The idea is to loosen the stain, not push it in further. Give it a minute. If the mark is fading, keep going. Once it’s gone, wipe the area with a clean damp cloth to remove any soap, then dry it with a dry microfiber. Leaving soap residue behind attracts more dust and grime, so the rinse step matters. This method clears grease, light food stains, fingerprints, and most surface grime without any specialist products. Use a pH-Neutral Vinyl Cleaner for Stubborn Marks When soap and water don’t shift it, move to a cleaner made for vinyl wrap. The pH-neutral part is important. Cleaners outside that range gradually damage the film surface, especially with repeated use over months. Apply the cleaner to your cloth first, not directly onto the wrap. Wipe the stain slowly and let it sit for about 20 to 30 seconds. Wipe again, then rinse with a clean damp clothand dry the surface. This works well on older grease stains, light scuff marks, and residue left by cleaning sprays that weren’t rinsed off properly. A bottle of pH-neutral vinyl wrap cleaner is worth having on hand, especially on larger installations like architectural vinyl wraps covering walls or cabinet runs. Use Isopropyl Alcohol for Ink, Adhesive, and Oil Stains Ink, permanent marker, adhesive residue, and built-up oil don’t come off with soap or general cleaners. These need isopropyl alcohol at 70% concentration. Put a small amount on a microfiber cloth. Don’t pour it directly on the wrap. Dab at the stain and let the alcohol sit on it for a few seconds. Then wipe gently. Repeat two or three times if needed. Hard rubbing won’t speed things up and can dull the surface finish. After the stain is gone, rinse the area with a damp cloth and dry it straight away. Alcohol evaporates fast, but rinsing makes sure nothing is left behind that could affect the film over time. Dry the Surface After Every Clean This is the step people skip most. Water sitting near edges or seams can work underneath the film and weaken the adhesive. It also leaves white water marks, especially in areas with hard tap water. After cleaning, go over the full area with a dry microfiber cloth. Pay close attention to edges and any seams. If you’re working on a large installation, like wrapped cabinet doors or a full accent wall, clean in sections and dry each one before moving on. It takes a few extra minutes but keeps the bond intact and the surface looking clean longer. Common Stains and How to Handle Them Hard
Renovate or Decorate Your Doors with Architectural Film
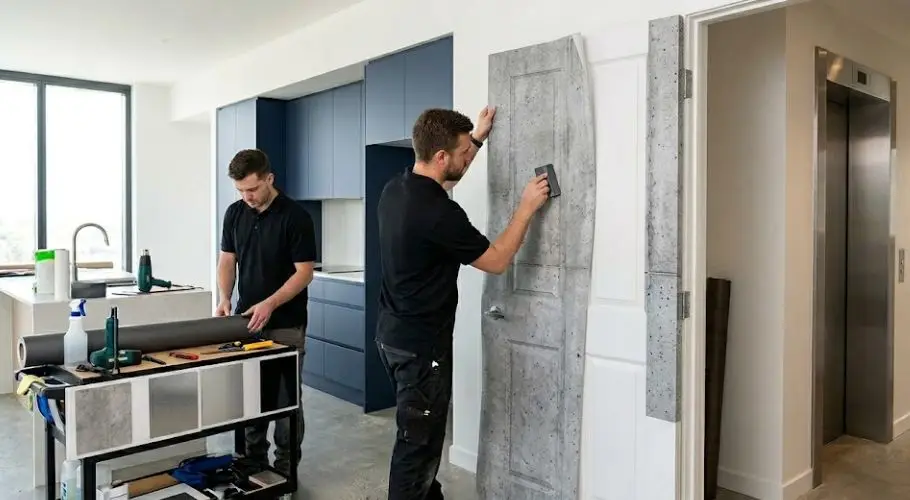
Most people do not think much about their doors until something goes wrong. The paint starts peeling near the handle. The surface gets scuffed. The finish looks ten years behind everything else in the room. At that point, the usual response is either grab a paintbrush or start pricing replacements. Both options are more involved than they seem, and neither one is ideal for every situation. Door wraps are a practical alternative that more homeowners, renters, and commercial property managers are turning to. A door wrap is a self-adhesive architectural film applied directly over the existing door surface. It changes the appearance completely without requiring the door to be removed permanently, rebuilt, or refinished from scratch. The result looks clean and deliberate, and it stands up to regular use better than most people expect. What Architectural Film Actually Is Architectural film is a multi-layer vinyl product built specifically for surfaces that get touched, bumped, and exposed to moisture on a regular basis. The top layer carries the finish, whether that is a wood pattern, a matte color, a stone texture, or a metallic look. Below that sits a dimensional embossed layer that gives the surface real texture, not just a printed image on flat plastic. The bottom layer is the pressure-sensitive adhesive that bonds to the door. The material is designed to flex and stretch, which matters when working around door edges, panel grooves, or moulded profiles. It holds its shape once applied and does not lift at the corners the way thinner vinyls can. Door wraps made from quality architectural film are a standard choice in commercial fit-outs, hotel refurbishments, and residential upgrades because the finish is consistent and installation time is short compared to painting or full replacement. Door Wraps vs Painting vs Replacement Before committing to any approach, it helps to understand what each one actually involves in practice. Painting sounds simple but rarely plays out that way. The door surface needs sanding, priming, and degreasing before any paint goes on. Multiple coats are usually required, with drying time between each one stretching the job across several days. High-contact areas near handles and edges tend to show wear within the first year. Touch-ups become a recurring task rather than a one-off fix. Full door replacement is the most disruptive option. New doors need to be sized to the existing frame, and the fit is rarely perfect without adjustment work. Hinges may need repositioning. The surrounding wall often needs patching and repainting once the old frame is disturbed. Hardware usually needs replacing too. For one door, that is manageable. For a property with many doors to update, the cost and downtime become significant. Commercial door wraps sidestep all of that. The existing door stays in place, and the surface is transformed in hours rather than days. What Surfaces Accept Door Wraps Architectural film adheres reliably to most door materials that are in reasonable structural condition. Compatible door surfaces include: Painted solid wood and stained timber doors MDF panel doors and hollow core interior doors PVC and uPVC door surfaces Steel and aluminum doors Laminate-faced doors Melamine-coated wardrobe and cabinetry doors Fire-rated doors with smooth face panels (using appropriate film grade) Surfaces that are actively failing, such as bubbling laminate, rusted steel, or structural cracks, need repairs before any film goes on. The wrap cannot compensate for an unstable base. Minor imperfections like small chips or shallow scratches can generally be filled and sanded flush beforehand without any effect on the final result. Finish Options for Door Wraps One of the main reasons door wraps are chosen over paint is the range of available finishes. Paint gives you color. Architectural film gives you color, texture, pattern, and depth across a much wider visual range. Finish categories commonly used on door wraps: Wood grain finishes (oak, walnut, ash, maple, pine, wenge) that replicate the grain and texture of real timber Matte solid colors (black, white, warm grey, charcoal, forest green, deep navy) for contemporary flat-finish looks Brushed and polished metals (aluminum, brass, gunmetal, rose gold) for commercial or high-end residential interiors Concrete and raw stone textures for industrial and modern architectural styles High gloss finishes in both colors and wood tones for a polished, formal result Textile-effect films such as linen and woven looks for softer interior settings Each category branches into many individual options. A wood grain door wrap, for instance, comes in dozens of tones from pale Scandinavian birch to deep smoked walnut, each with a different grain scale and surface texture depth. The embossing on quality film means you can feel the grain under your hand, not just see it printed on the surface. How Long Door Wraps Last Lifespan depends on the film grade used and the conditions the door faces day to day. A quality interior door wrap on a residential door holds up well for several years under normal household use. The surface resists everyday contact marks and scuffs better than standard paint, particularly around high-wear spots like edges and handle areas where paint tends to chip first. Commercial-grade door wraps used in offices, hotel corridors, and retail environments are built for heavier daily use and are regularly specified for five or more years in those settings. Humidity and direct sunlight are the two environmental factors that most affect how long a door wrap performs. Interior-grade films are not designed for front entry doors exposed to full weather conditions. Exterior-rated architectural films are formulated differently and handle temperature changes, prolonged UV exposure, and rain without lifting or fading prematurely. For bathrooms, laundry rooms, and other wet areas, moisture-rated interior films are the correct specification. Where Door Wraps Get Used Door wraps suit both residential and commercial settings. The approach fits anywhere the goal is a clean surface update without structural disruption. Residential uses: Bedroom, hallway, and living room interior doors Kitchen cabinet and pantry doors Bathroom and ensuite doors Built-in
Can You Put Vinyl Wrap on Top of Vinyl Wrap?
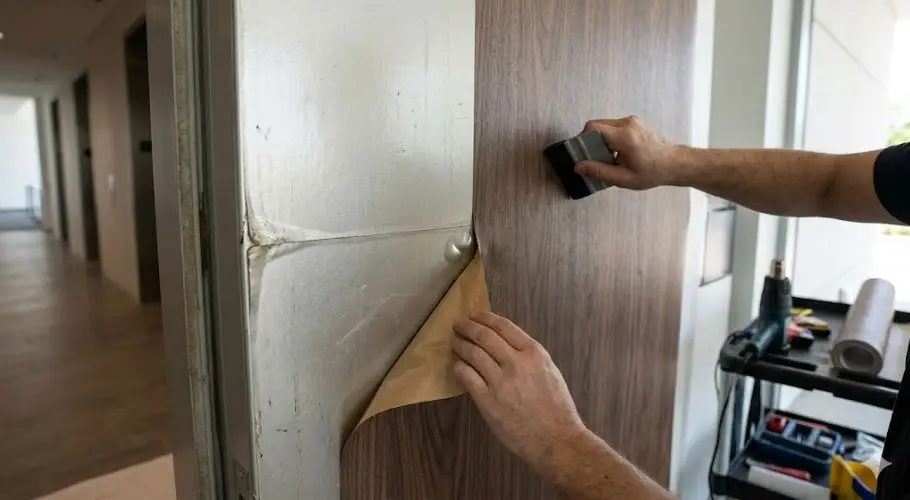
Yes, you can apply vinyl wrap on top of an existing layer. But whether it holds depends on the condition of the base film and the type of surface you are working with. In many cases, removing the old film first gives you a better result and fewer problems down the line. This comes up regularly in commercial settings, where elevator panels, hotel doors, or lobby walls already have a layer of architectural vinyl on them. The wrap is worn or outdated, and the question is whether you need a full removal or can just apply fresh film on top. How Architectural Vinyl Wrap Bonds Architectural vinyl film is a pressure-sensitive, self-adhesive surface material. It is made up of three layers: a decorative film, an adhesive layer, and a release liner. It is designed to bond directly to smooth, clean, non-porous substrates like aluminum, stainless steel, gypsum board, glass, and finished wood. When you apply a second layer on top of an existing film, the adhesive is bonding to vinyl rather than the original substrate. That is a weaker bond. How much weaker depends entirely on the condition of the first layer. A clean, fully adhered base gives the second layer something solid to grip. A worn, contaminated, or partially lifting base means the new film will fail faster. The age of the existing film also plays a role. Older architectural vinyl can become harder and less flexible over time, especially in areas exposed to temperature changes or cleaning chemicals. A second layer applied over a stiff, aged base is more likely to crack or lift at stress points like door edges and panel corners. When Layering Is a Reasonable Option Layering can work when all of the following are true, not just some of them. 1. The existing wrap is in excellent condition: No lifting at edges or corners No bubbles, cracks, or wrinkled sections Fully bonded across the entire panel, including seams No contamination from moisture, grease, or cleaning products 2. The surface is flat and simple: Flat panels like door faces or straight elevator wall panels are the most suitable. Deep curves, tight corners, and transitions between panels make layering harder. A second layer adds thickness, which makes the film stiffer and more likely to pull away from edges. 3. The project is short to medium term: If you need the new wrap to last its full expected service life of up to 12 years indoors, a clean substrate install is the right approach. Layering is more appropriate for temporary updates or short-term refreshes before a larger renovation. 4. You are applying a smaller overlay, not a full rewrap: Logos, accent strips, or design elements applied on top of an existing full wrap can hold up well because the surface area is smaller and edges are easier to control. Keep in mind that removing the overlay later will almost always disturb the base film underneath. The Risks of Applying a Second Layer Edge and Corner Lifting Edges are the most vulnerable point in any wrap installation. Architectural vinyl is trimmed precisely to fit panels, and those cut edges need to seal flat. Adding a second layer increases total film thickness, making clean edge bonding harder. In high-traffic areas like elevator lobbies or hotel corridors, edges are where a double-layered wrap will start to peel first. Imperfections Transfer Through Any flaw in the base layer shows in the new surface above it. A small bubble, a raised seam, or a section of wrinkling in the old film will be visible in the new one. On elevator cab panels or lobby walls, where the finish needs to look professional, this is a real issue. These flaws often become more obvious over weeks rather than appearing immediately. Thickness Build-Up at Panel Transitions Standard architectural vinyl has a specific thickness by design. A second layer creates build-up at panel edges and transitions. This can make borders look raised or uneven, particularly on surfaces with tight tolerances or recessed edges. Harder Removal Down the Line Two bonded layers are more time-consuming to remove than one. Adhesive from older films hardens over time. Multiple layers aged at different rates can behave differently during removal and increase the risk of substrate damage. On stainless steel panels, finished doors, or aluminum elevator interiors, that is a risk worth avoiding. Why Removing the Old Film First Is Usually Better Removing the existing film takes more time upfront. What you get in return is a clean substrate that the new film bonds to properly. Adhesion is stronger, the finish is cleaner, edges seal correctly, and the wrap performs as expected for its full lifespan. It also gives you the chance to inspect what has been sitting underneath. Moisture damage, adhesive residue build-up, or surface deterioration that has been hidden under the old film for years can be dealt with before the new wrap goes on. Covering those issues with a second layer delays the problem and usually shortens the life of the new installation. For properties where architectural vinyl wrap is doing daily work in high-use spaces, that matters. Interior architectural films like 3M DI-NOC and LG Benif are rated for up to 12 years indoors when installed correctly on a clean surface. Layering compromises that rating and can void warranty coverage depending on the manufacturer. How to Prepare If You Do Decide to Layer If you have assessed the surface and layering is the right call, preparation determines whether it holds. Clean the existing film with isopropyl alcohol: Remove all grease, dust, and residue. Even contamination you cannot see will weaken the bond. Press down any lifting edges: If a section will not stay down, that panel needs full removal, not a second layer. Check all seams: Any raised seam in the base film will show through the new surface. Flat and fully bonded seams are non-negotiable. Use the same film type: Match the
How Lighting Affects Vinyl Wrap Finishes and Colours
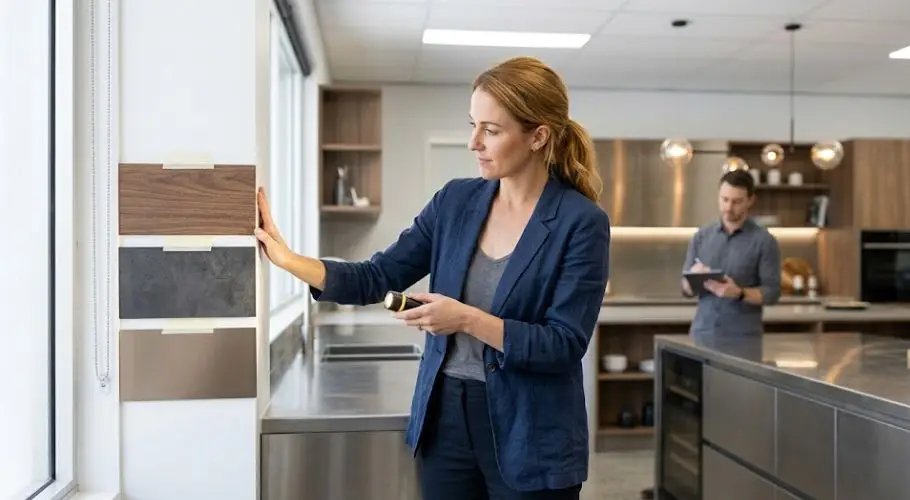
Picking a vinyl wrap colour is exciting. But a lot of people choose a sample under one type of light and then wonder why it looks completely different once it’s installed. That’s not a flaw in the wrap. That’s just how light and surface finishes work together. Understanding how lighting affects vinyl wrap finishes can save you a lot of second-guessing. Whether you’re wrapping a kitchen, an elevator, or a feature wall, the light in that space will shape how the final result looks every single day. Why Lighting and Vinyl Wraps Are Closely Linked Vinyl wraps aren’t flat surfaces in the traditional sense. Many of them mimic real materials like timber, stone, concrete, and brushed metal. These finishes have surface texture. They have peaks and grooves. And those tiny details catch light differently depending on where the light comes from and what type it is. This is especially true for textured finishes. A wood grain wrap, for example, might look warm and rich under soft downlights but appear dull and washed out under harsh fluorescent lights. The wrap hasn’t changed. The light has. That’s the core thing to understand before you commit to any colour or finish for your space. How Lighting Differs Across Commercial Spaces Not all commercial spaces use light the same way. A hotel lobby is lit very differently from a hospital corridor or a retail store. And because Resurface Wraps works across hospitality, corporate, retail, healthcare, and institutional environments, lighting conditions can vary quite a lot from one project to the next. Corporate and Office Environments Corporate spaces almost always run on cool, bright overhead lighting. This includes open-plan offices, reception areas, and meeting rooms. Under this kind of light, stone and concrete-effect wraps read cleanly and feel intentional. They don’t fight the light, they suit it. Wood finishes can still work here but tend to look more formal and less warm than they would in a residential or hospitality setting. The same applies to elevator interiors and door wraps in corporate buildings. These surfaces are seen in passing, often under direct downlights. A finish that looks flat under that kind of lighting won’t leave the impression you’re going for. Matte and satin finishes in mid-range tones tend to hold up better in these environments than very dark or very light gloss options. Retail and Healthcare Settings Retail lighting is usually the brightest and most deliberate of all. Stores use lighting as a design tool, and wrap finishes behave accordingly. Gloss and metallic finishes can look striking in retail because the lighting is often set up to make surfaces pop. Abstract and solid-colour wraps also carry well in these spaces because the brightness of the light keeps them vivid rather than flat. Healthcare environments are a different story. Lighting in hospitals and clinics is functional and consistent, usually cool and even. Wrap choices here tend toward neutral stone, solid, and concrete finishes that hold up under clinical light without looking stark. Wall wraps and casework surfaces in healthcare settings need to look clean and professional, and the right finish choice under that type of lighting makes a real difference to how the overall space reads. Space Type Common Lighting Style Recommended Finishes Avoid If Possible Corporate Office Cool overhead LED Concrete, stone, satin neutrals High-gloss black Reception Areas Mixed decorative lighting Wood grain, satin, metallic accents Cheap-looking bright gloss colours Retail Stores Bright focused lighting Gloss, metallic, bold solids Flat dark mattes Healthcare Even cool lighting Neutral matte, stone, solid colours Excessive gloss Hospitality Warm layered lighting Timber, textured finishes, feature metallics Clinical greys How Different Vinyl Wrap Finishes Respond to Light The finish type is just as important as the colour when it comes to lighting. Here’s how the main vinyl wrap finish types behave. Gloss Finishes Gloss wraps are highly reflective. In a room with plenty of natural light or bright downlights, a gloss finish will bounce light around the space. This can make a room feel larger and more open, which is sometimes exactly the goal. But gloss under harsh direct lighting will also highlight every fingerprint, dust mark, and surface imperfection. If you’re using gloss in a busy area, consider the maintenance side of that. Matte Finishes Matte surfaces absorb light rather than reflect it. This gives them a smooth, understated look that holds up well under various lighting conditions. They’re very popular in contemporary interiors because they don’t compete with the light, they just sit quietly. The one thing to watch is that very dark matte wraps in poorly lit spaces can almost disappear. Dark matte greys and blacks need enough ambient light to read as intentional rather than shadowy. Textured Finishes Textured vinyl wraps, including wood grain, linen, concrete, and leather effects, rely heavily on directional light to show their depth. When light hits them at an angle, the surface texture becomes visible and the wrap looks three-dimensional. Flat, direct overhead lighting can wash this depth out entirely, making the wrap look printed rather than textured. If you want a textured finish to really show up in your space, think about where the light is coming from and whether it will catch the surface at an angle. Metallic and Shimmer Finishes Metallic wraps contain reflective particles that need direct light to activate the shimmer. Without good lighting, a metallic gold wrap can read as a flat mustard yellow. A chrome or brushed silver wrap might look more like a muted grey. These finishes reward spaces with strong, directional light sources. They’re a great fit for feature walls in retail or hospitality settings where lighting design is already part of the brief. If you’re unsure which finish suits your project, it’s worth looking at the full range of vinyl wrap finishes available to compare how they’re described and shown. Finish Type Best Lighting Conditions How It Looks Things to Watch Gloss Natural light, bright downlights Reflective, vibrant, spacious Shows fingerprints, glare, imperfections Matte Mixed lighting, soft ambient
Vinyl Wrap vs Wallpaper: Why Commercial Walls Need More Than Paper
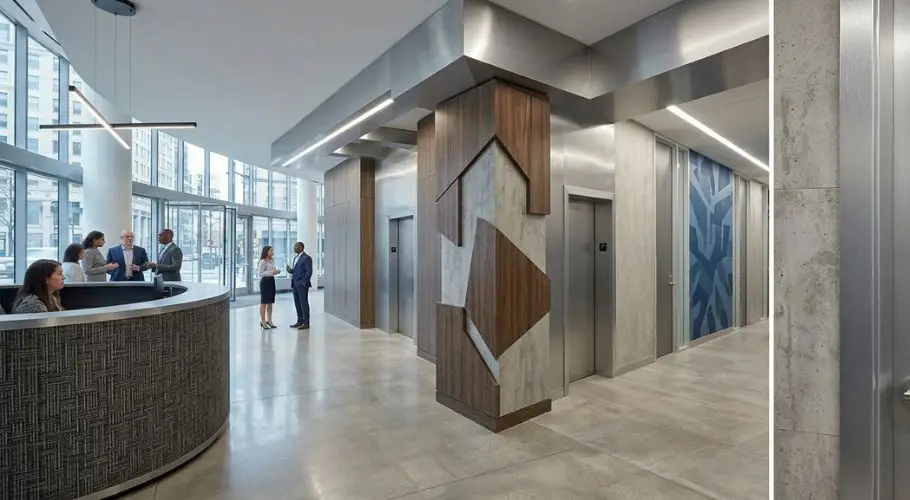
Walk into most commercial spaces and the walls are working harder than people realise. They get bumped by trolleys, wiped down by cleaning staff, exposed to steam, grease, condensation, and constant foot traffic. The surface covering on those walls needs to keep up. Wallpaper, for all its visual appeal, often cannot. Vinyl wrap can. This is not about dismissing wallpaper entirely. It has its uses. But when you are covering walls in a commercial environment, the demands are different from a home living room. This blog breaks down exactly where each material stands, and why most commercial spaces end up better off with vinyl wrap. Common Failures of Commercial Wallpaper Wallpaper looks good on installation day. The problem is what happens in the weeks and months after that. Commercial spaces have higher humidity, more temperature fluctuation, more cleaning, and more physical contact with walls than any residential setting. Standard wallpaper paste does not love any of those conditions. Seams start to lift. Corners peel. Sections near sinks or kitchens bubble up. Even heavy-duty commercial-grade wallpaper has a ceiling on how much daily wear it can take before it starts to look tired. In most active commercial settings, that ceiling arrives somewhere between three and five years. Why Architectural Vinyl Wrap is Ideal for Commercial Surfaces Vinyl wrap is not a wallpaper alternative. It is a different class of product entirely. Architectural-grade vinyl wrap films are manufactured to handle surfaces that see regular cleaning, moisture, physical contact, and UV exposure. They bond directly to the wall and form a sealed surface that does not absorb moisture, does not peel at seams in the same way, and does not stain as easily. The material itself is scratch-resistant and moisture-resistant. You can wipe it down with standard cleaning products without worrying about damaging the surface or lifting the film. For a commercial space that needs to be cleaned regularly, that alone is a significant practical difference. If you have been exploring commercial surface wrap options for your business, the cleaning and maintenance angle is usually one of the first things that stands out. Vinyl Wrap vs. Wallpaper: A Side-by-Side Comparison Factor Vinyl Wrap Commercial Wallpaper Average lifespan (commercial use) 7 to 10 years 3 to 5 years Moisture resistance High Low to moderate Scratch resistance High Low Wipe-clean surface Yes Partial (coated types only) Seam lifting over time Minimal Common Suitable for humid areas Yes No Partial repair without full redo Yes Difficult The lifespan difference alone changes the cost conversation. Wallpaper that needs replacing every three to five years in a commercial setting adds up quickly when you factor in labour, materials, and business downtime for the work to be done. Cost-Effectiveness of Vinyl Resurfacing vs. Wallpaper Wallpaper can appear cheaper when you look at the price per roll. That impression does not survive a longer view. Consider what the total cost looks like over ten years for a commercial space. With wallpaper, you are likely looking at at least two replacement cycles in that period, plus repairs along the way for damaged sections. Each replacement involves professional installation, paste, drying time, and the business disruption that comes with having a space out of action. Vinyl wrap involves a higher upfront material cost in some cases, but the installation is typically faster, the lifespan is longer, and partial repairs are much more straightforward. One damaged panel can be replaced without touching the rest of the wall. With patterned wallpaper, matching a damaged section to an existing installation is difficult, especially if the original batch is no longer in stock. Over a ten-year period, commercial vinyl resurfacing consistently works out as the lower-cost option when maintenance and replacement are factored in. Applying Vinyl Wrap to Complex Commercial Surfaces One of the clearest arguments for vinyl wrap in commercial settings is surface compatibility. Vinyl wrap can be applied to walls, columns, MDF panels, laminate surfaces, doors, and even some curved structures. Wallpaper needs a flat, smooth surface to be applied cleanly. Anything irregular, curved, or non-standard is outside its range. Commercial spaces are rarely all flat walls. Reception desks, feature columns, panelled surfaces, and built-in joinery are common. Vinyl wrap handles all of these. Wallpaper does not. That flexibility matters when you are trying to create a consistent look across an entire commercial interior rather than just covering the easy flat bits. Commercial Vinyl Wrap Finishes and Design Trends A common assumption is that wallpaper offers more design variety. That was probably true ten or fifteen years ago. It is not really accurate now. Vinyl wrap is available in a wide range of finishes, including: Wood grain in multiple tones and species Stone and concrete textures Brushed and polished metal effects Matte and gloss solid colours Printed custom designs and brand patterns Fabric and textile-effect finishes Wallpaper does offer embossed textures and some traditional decorative patterns that vinyl cannot fully replicate. But for modern commercial interiors, that category is a fairly narrow slice of what most businesses actually need. The practical design range for vinyl wrap covers the vast majority of commercial briefs, and the added benefit is that the same finish holds up for years rather than fading or peeling. Hygiene and Compliance in Commercial Settings This is particularly relevant for hospitality, healthcare, and food service environments. Commercial spaces in these sectors often have hygiene and surface standards that need to be met and maintained. Vinyl wrap advantages for regulated environments: Non-porous surface prevents bacteria from embedding in the material Easy to disinfect with appropriate cleaning products Architectural-grade films available with relevant fire classifications Low VOC options available for enclosed commercial spaces No paste or adhesive off-gassing once installation is complete Wallpaper adhesives can off-gas during and after installation. Paper-based surfaces, even coated ones, are porous to some degree and harder to fully disinfect. In a restaurant kitchen, a hospital corridor, or a gym changing room, that matters. Vinyl wrap is simply a more hygienic surface for the
How to Choose Commercial Wrap Installers for Offices and Hotels
Choosing the right installer for a commercial wrap project is not as simple as picking the cheapest quote. Offices and hotels have different demands compared to a home renovation. There is more surface area, more foot traffic, tighter timelines, and usually a brand standard to maintain. Getting it wrong means downtime, visible mistakes, and costly re-dos. This guide covers what to look for before you hire anyone. It breaks down the key questions to ask, the red flags to watch for, and what a good installation actually looks like in a commercial setting. What Is Commercial Vinyl Wrapping? Commercial vinyl wrapping involves applying adhesive vinyl film over existing surfaces. This includes reception desks, elevator doors, wall panels, kitchen cabinetry, bathroom vanities, and more. It is a cost-effective alternative to full replacement and works well in environments where disruption needs to be kept to a minimum. For hotels and offices especially, wrapping is popular because it refreshes interiors quickly without the mess and cost of traditional refurbishment. The finish can mimic wood, stone, metal, or solid colour depending on the film used. When done properly, it is hard to tell apart from the real thing. Why the Installer Matters More Than the Film Good quality vinyl film is widely available. The difference between a great result and a disappointing one almost always comes down to the installer. Even premium film will bubble, lift, or peel if it is applied to a poorly cleaned surface or by someone without experience on complex shapes. Commercial spaces also have more complicated surfaces than residential ones. Curved cabinetry, deep grain textures, large flat panels, and high-use areas like lift doors all require different techniques. An installer with only domestic experience may struggle with the scale and precision that commercial jobs demand. Things to Look for When Comparing Installers 1. Experience With Commercial Projects Specifically Ask directly whether they have worked in hotels, offices, or other commercial environments. Residential wrapping is a different skill set. The surfaces, timelines, and expectations are not the same. A good installer should be able to name specific commercial jobs they have completed and explain what was involved. If you are looking at large-scale interior resurfacing, it also helps to ask how many installers they send to a job. A single person doing a 20-room hotel fit-out is going to take too long and the quality may drop toward the end of a marathon session. 2. A Portfolio of Finished Work Photos matter. Ask to see before and after images from jobs similar to yours. Look for clean joins, smooth surfaces, neat edges around hardware, and consistent colour across large panels. If the photos only show small pieces or residential kitchens, that tells you something. Video walkthroughs of completed commercial spaces are even better. They are harder to selectively crop and give a more honest view of the overall finish. 3. The Brands and Films They Use Not all vinyl film is the same. There are big differences in durability, texture replication, and ease of application. Well-regarded brands in the commercial space include 3M, Avery Dennison, and Bodaq. If an installer cannot name the brands they work with or seems vague about specifications, that is worth questioning. For a hotel or office, you also want to ask about durability ratings. High-traffic areas need film with stronger adhesion and better resistance to cleaning products. The film used on a hotel lift door needs to handle hundreds of contacts per day. 4. Surface Preparation Process Good wrapping starts before the vinyl is unrolled. The surface has to be clean, smooth, and properly primed in some cases. Ask the installer what their preparation process involves. A thorough answer should mention degreasing, sanding where needed, checking for moisture, and allowing surfaces to reach the right temperature before application. Skipping preparation steps is one of the most common causes of early failure. If an installer brushes past this question, that is a warning sign. 5. How They Handle Large or Complex Areas For commercial projects, the ability to work on large uninterrupted panels without visible seams is important. Ask how they manage joins on wide surfaces. Ask whether they use heat guns, squeegees with edge protectors, or post-heating techniques to ensure the film conforms properly to edges and curves. Some of the trickier areas in offices and hotels include: Lift doors and surrounds Floor-to-ceiling cabinetry Curved reception desks Bathroom vanity units with hardware cutouts Structural columns with uneven surfaces An experienced installer will have a clear method for each of these. If they seem uncertain, they probably are. 6. Timeline and Working Hours This is particularly relevant for hotels and working offices. Ask whether they can work during off-peak hours or outside business hours to reduce disruption. Some installers will charge a premium for evening or weekend work. Others build flexible scheduling as standard. A realistic timeline is also important. Be cautious of anyone who promises an unusually fast turnaround on a large job. Speed sometimes comes at the expense of quality, especially with adhesive vinyl that needs time to properly set. 7. Warranty and Aftercare Ask what warranty they offer on their workmanship separate from the film manufacturer warranty. A confident installer will stand behind their work for a reasonable period. Twelve months is a reasonable minimum. Some will offer longer. Also ask what the aftercare process looks like. What cleaning products are safe to use on wrapped surfaces? What should staff avoid doing? A good installer will give you clear guidance on this rather than leaving you to figure it out. Questions Worth Asking Before You Sign Anything If you are not sure where to start, here is a straightforward list of questions to run through: Can you share examples of commercial projects similar to mine? What film brands do you use and why? How do you prepare surfaces before application? What is your process for large panels and avoiding visible seams? Can you work outside business hours if needed? What does
Why Choose Vinyl Wrap Over Paint? A Practical Comparison
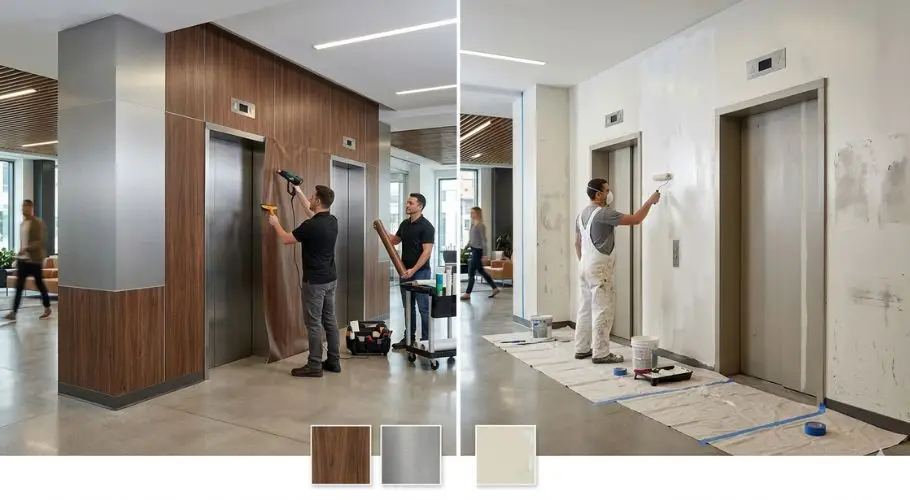
When a surface looks worn or outdated, most people think of paint first. It is a familiar option. You know how it works and you know what it costs upfront. But for commercial spaces that see daily wear, paint often needs more attention than people expect. Vinyl wrap is a different approach, and it is worth understanding how the two compare before making a decision. It applies directly over existing surfaces, skips most of the prep work that paint requires, and comes in a wide range of finishes that hold up well in busy commercial spaces. This blog covers the main differences between vinyl wrap and paint. Cost, durability, installation, surfaces, and where each one makes sense. What Paint Actually Involves Paint works well for low-traffic areas or simple touch-ups. It is easy to source, most contractors can apply it, and the upfront cost is usually lower than other options. For a back office or a storage room, paint is often a reasonable choice. In commercial spaces with heavy daily use, paint tends to break down faster. Hallways, elevator interiors, lobby walls, and door surfaces take a lot of contact every day. Paint chips, scuffs, and fades in these areas. When a section gets damaged, touching it up is harder than it sounds. New paint rarely matches old paint exactly, and patchy walls can end up looking worse than the original damage. How Vinyl Wrap Works Vinyl wrap is a thin adhesive film that bonds directly to an existing surface. It does not require removing the original material. It applies over the top, creating a smooth finish. It comes in many textures including wood grain, marble, concrete, brushed metal, matte, and gloss solid colors. The film has multiple layers. The outer layer resists scratches and moisture. The adhesive layer beneath holds it firmly without damaging what is underneath. When you remove it later, it peels off cleanly. There is no sanding, no stripping, and no residue left behind. Film construction and grade vary depending on the surface type and how much wear it needs to handle, which is why vinyl film specifications differ from one application to the next. How the Two Compare Side by Side Here is a straightforward look at how vinyl wrap and paint stack up across the areas that matter most in commercial settings: Factor Vinyl Wrap Paint Durability Handles daily contact from hands, bags, and equipment Chips, scuffs, and fades under regular friction Moisture resistance Holds finish in humid conditions without peeling Bubbles and peels in bathrooms and kitchens over time Maintenance Minimal upkeep, wipe clean with a damp cloth Touch-ups needed every one to two years in busy areas Lifespan Seven to twelve years in commercial settings Five to seven years before a full repaint is needed Installation time Faster, spaces usable same or next day Multiple coats and drying time between each Disruption No fumes, no sanding dust, no extended ventilation Fumes and dust require downtime and ventilation Reversibility Peels off cleanly without surface damage, works great for lease-end requirements Requires stripping and full prep to redo Finish consistency Uniform color and texture across the full surface Brush marks, roller patterns, or uneven coverage possible Upfront cost Higher per square foot Lower per square foot Long-term cost Lower over time due to fewer maintenance cycles Adds up with repeated touch-ups and repaints How Long Does Each One Last? In a low-traffic environment, a painted wall can hold up for several years without much attention. In commercial spaces like hotel corridors, retail stores, healthcare facilities, or restaurant interiors, paint usually needs touch-ups within two years and a full repaint every five to seven years. Good quality vinyl wrap installed correctly in a commercial setting typically lasts between seven and twelve years. Maintenance is minimal. Basic cleaning with a damp cloth is enough for most surfaces. Hotel corridors, healthcare lobbies, and retail fit-outs are among the commercial interior resurfacing projects where vinyl consistently outlasts paint by a significant margin. Cost: Upfront vs. Long Term Vinyl wrap usually costs more upfront than paint on a per-square-foot basis. That part is straightforward. But the total cost over several years looks different when you account for maintenance and repainting cycles. Paint costs to consider: Surface prep, priming, and multiple coats Touch-ups every one to two years in busy areas Full repaint every five to seven years Downtime and disruption during each round of work Vinyl wrap costs to consider: Film material based on type and quality Professional installation Very little maintenance cost year over year No repainting cycles needed Minimal disruption during installation Over a ten-year period, vinyl wrap often works out to be the more cost-effective option in high-traffic commercial spaces. Not always, but often enough that it is worth calculating before committing to paint. What Surfaces Can Be Wrapped? More surfaces can be wrapped than most people expect. Vinyl wrap is not limited to walls. In commercial renovation projects, it is commonly applied to: Interior and exterior doors Elevator cab walls and ceiling panels Elevator landing surrounds and frames Millwork, casework , and cabinetry Reception desks and countertops Columns and structural pillars Ceiling tiles Retail fixtures and display units Storefront elements The main requirement is that the surface is smooth, solid, and properly cleaned and prepped before installation. Each of these falls under the broader category of architectural vinyl wrap applications used in commercial interior renovation. When Paint Is Still the Right Call Vinyl wrap is not the right answer in every situation. There are cases where paint makes more sense. Heavily textured surfaces: film does not bond cleanly to rough or uneven textures Irregular shapes and detailed trim: complex profiles are hard to cover neatly with vinyl Very low traffic areas: a back office or storage room does not need the durability vinyl offers Limited starting budget: if upfront cost is the main concern and long-term maintenance is not, paint costs less to start Small isolated areas: for a
Step-by-Step Guide to Maintaining Wrapped Surfaces
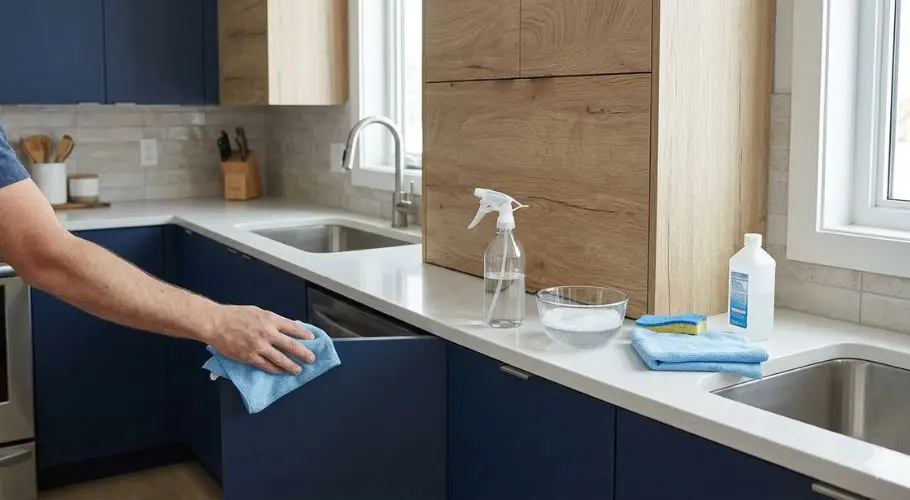
Wrapped surfaces are showing up in a lot of homes these days. Kitchen cabinets, bathroom panels, furniture, doors. They are a simple way to update a space without tearing everything out. But like most things, they need some basic upkeep to stay in good shape. A lot of people think that once the wrap is applied, there is nothing else to do. That is not right. Dirt, grease, and moisture build up over time. If you leave it too long, the wrap can start to peel at the edges or look dull. The good news is the cleaning process is not hard at all. This guide covers what to do, how often to do it, and what to avoid. Why Regular Cleaning Matters The main reason wrapped surfaces wear out early is lack of cleaning. Grease and grime do more than just make the surface look dirty. When they sit on the surface for too long, they start to get into the edges and seams. Once moisture gets under the wrap, the glue underneath loosens and peeling starts. Cleaning regularly stops that from happening. It also means you are not using strong products to get through months of built-up dirt. Light cleaning done often is better for the surface than heavy scrubbing done once in a while. Most wraps, including those used in kitchen cabinet resurfacing, last for years when looked after properly. What You Need No special products are needed. Most of this you probably already have at home: Warm water Mild dish soap or a gentle all-purpose cleaner Soft microfibre cloths A soft sponge Rubbing alcohol for tough spots A spray bottle (optional) Keep the following away from wrapped surfaces: Bleach or cleaners with ammonia in them Paint thinners, nail polish remover, or any strong chemical sprays Steel wool or rough scrubbing pads Steam cleaners These do not just damage the top layer. They break down the glue underneath and the wrap will not last as long. Step-by-Step Cleaning Guide Step 1: Dry wipe first Start with a dry microfibre cloth. Wipe the whole surface to remove dust and loose dirt. This matters because wiping dry dust with a wet cloth can scratch the surface. It only takes a minute. Step 2: Make your cleaning mix Mix warm water with a few drops of dish soap in a bowl or spray bottle. You do not need much soap. A light mix is enough for regular cleaning. Step 3: Wipe the surface Dampen your cloth and wring it out well. It should feel damp, not wet. Wipe in one direction using gentle, steady strokes. Do not scrub in circles. This helps avoid streaks and stops you from catching the edges of the wrap. Step 4: Deal with grease spots For grease, hold the damp soapy cloth on the spot for 20 to 30 seconds before wiping. This gives the soap time to loosen it. If that does not work, put a small amount of rubbing alcohol on a cloth. Dab it on, wipe it off, and do not let it soak in. Step 5: Wipe off any soap Go over the surface with a clean damp cloth to remove any soap left on it. Soap left on the surface can make it look streaky and attract more dust. Step 6: Dry the surface Dry everything with a clean dry cloth. Do not skip this step. Water sitting near the edges can slowly loosen the glue underneath. This is one of the main reasons edges start to lift. Mistakes That Damage Wrapped Surfaces Scrubbing hard: When something is stuck on, most people scrub harder. This scratches the wrap. Let the soap or cleaner sit for a bit first to loosen the dirt, then wipe gently. Using too much water: A soaking wet cloth pushes water into the edges and seams. Wring your cloth out properly before wiping every time. Skipping the edges: Edges are where problems usually start. When you clean, check them. If a small part is starting to lift, press it back down. Catching it early stops it from getting worse. Leaving grease too long: Kitchen surfaces collect grease quickly. When it hardens, you need stronger products to remove it. Wiping down after cooking keeps things easy to manage. Using the wrong products: This is probably the most common problem. General sprays, bathroom cleaners, and furniture polish often have chemicals that are too strong for vinyl wraps. Check the label before trying anything new. Different Surfaces Need Slightly Different Care Indoor surfaces like furniture and cabinet wraps are the easiest to look after. They are not exposed to much moisture or big temperature changes. Regular gentle cleaning is usually all they need. If you have had bathroom surfaces wrapped, those need a bit more attention. Steam from showers affects the glue over time, especially near the edges. Good airflow in the bathroom helps. Wiping down surfaces after showers when you can makes a real difference. Outdoor or commercial wrapped surfaces go through more wear and tear. Heat, cold, sunlight, and heavy use all add up. For these, it is worth doing a quick check every couple of months. Look for bubbles, fading, or edges that are starting to come away. Small problems are much easier to fix early. If you are not sure what type of wrap was used on a surface, ask whoever installed it before trying new products on it. How Often Should You Clean? Surface How Often Kitchen cabinets and splashbacks Once or twice a week Bathroom panels and doors Every few days, full clean once a week Furniture and shelving Once a week or when it looks dusty High-traffic or commercial areas Quick wipe daily, full clean once a week These are rough guides. Short regular cleans are always better than big cleans done less often. A Few Extra Things to Know Do not use wax or polish on matte finish wraps. It leaves a shiny look that does
Choosing the Right Finish for Architectural Projects
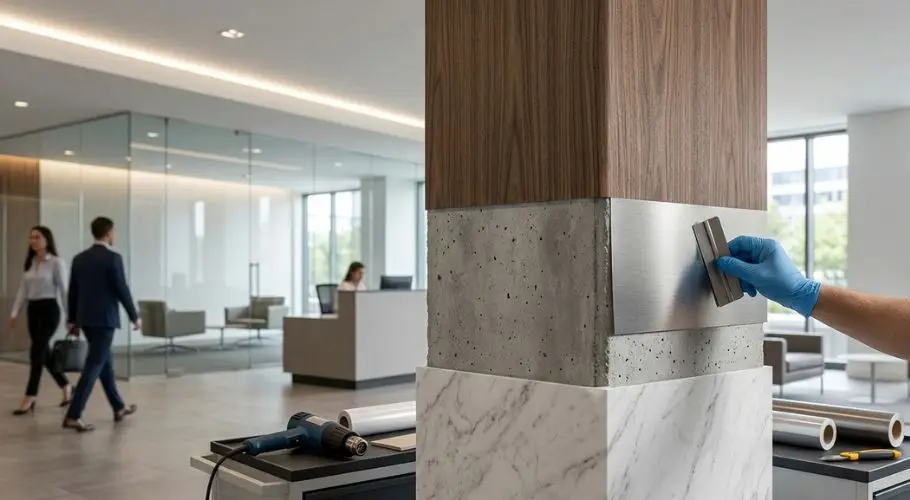
When you are working on an architectural project, picking the right finish can feel like a small decision. But it really is not. The finish you choose affects how the space looks, how long it lasts, how easy it is to clean, and how much it costs to maintain. Get it wrong and you end up with surfaces that chip, peel, fade, or just look out of place. And in a commercial setting, that can mean redoing work far sooner than anyone planned for. Vinyl architectural films have grown significantly as a finish option over the past decade. They are now used across commercial, hospitality, healthcare, and institutional projects, applied directly over existing surfaces in a wide range of textures and looks. This guide walks through the key things to think about when choosing a finish, what the main finish types are within architectural wraps, and how different spaces call for different solutions. What Do We Mean by an Architectural Finish? An architectural finish is any surface material applied to walls, doors, ceilings, furniture, or other structural elements inside a space. It is the layer you actually see and touch. In the context of architectural wrap films, that means a pressure-sensitive vinyl film applied directly over an existing surface to change its appearance and protect what is underneath. The finish does two things at once. It adds to the appearance of the space and it protects the surface underneath. Both of these matter equally. A finish that looks beautiful but wears out quickly is not a good finish. The Main Factors to Consider Before jumping into specific finish types, it helps to understand what questions to ask first. These are the core factors that should guide every decision. 1. Where Is the Surface Located? Think about whether the surface is in a high-traffic zone or a low-traffic one. A reception desk in a busy office will need a more durable finish than a wall in a private meeting room. The same logic applies to hospitals, hotels, retail stores, and schools. The heavier the use, the tougher the finish needs to be. Also think about whether the space is indoors or outdoors. Not all finishes are rated for exterior use. If you are working on storefront or building exteriors, you need materials that can handle UV exposure, moisture, and temperature changes. 2. What Is the Surface Made Of? Different base materials need different finishes. Drywall behaves differently than wood, metal, or glass. A finish that adheres well to one substrate may not work on another. This is why it is important to always confirm compatibility before selecting a finish, especially for projects that involve mixed materials like casework and millwork. Skipping this step often leads to adhesion failures or surface damage down the line. 3. What Maintenance Is Realistic? Some finishes need regular resealing or repainting. Others are nearly maintenance-free. This is something worth being honest about early in the project, because the maintenance burden has a real cost attached to it. A finish that requires specialist cleaning every three months might not be practical for a school corridor or a hotel lobby where cleaning staff need fast, simple solutions. The more demanding the upkeep, the more likely it is to be neglected, and neglected finishes deteriorate quickly. 4. What Is the Budget? Cost matters on every project. But it is worth thinking about the full life cycle cost, not just the upfront price. Installation, maintenance, and eventual replacement all add up. A traditional renovation that involves replacing materials entirely can cost significantly more than applying a wrap film over what is already there. Running those numbers before specifying is always time well spent. Types of Architectural Wrap Finishes Vinyl architectural films are not a one-size-fits-all product. There are distinct finish categories, each suited to different design goals and project types. Here is a breakdown of what is available and where each one tends to work best. Wood Grain Finishes: Wood grain films replicate the look and texture of real timber, from light oak and ash to darker walnut and wenge tones. Good quality films have a raised grain feel that is hard to distinguish from real wood at close range. They work well on doors, wall panels, reception desks, and ceiling features, and unlike real timber, they do not expand, contract, or require sealing. Metal Finishes: Metal finish films replicate the look of brushed steel, stainless steel, copper, brass, and bronze. They are lighter and easier to install than real metal panels, do not rust or corrode, and can be applied to curved surfaces that metal sheeting cannot. For elevator interiors especially, they are a practical solution. Solid Colour Finishes: Solid finishes come in matte, satin, and gloss options and work across walls, doors, furniture, and cabinetry. Matte shows fewer marks and fingerprints. Gloss is easier to wipe down and holds up better in high-contact areas. Fabric and Textile Finishes: Fabric and textile films replicate the texture of materials like linen, leather, hessian, and woven cloth without the maintenance demands of real upholstered surfaces. They can be applied to wall panels, headboards, and furniture fronts, and are used in hospitality, office, and healthcare settings. Stone Finishes: Stone and concrete wrap finishes replicate the look of marble, granite, slate, and concrete and are used for feature walls, reception areas, and countertops where real stone is not practical. They are also easier to maintain, as real stone requires periodic sealing and careful cleaning. Abstract and Decorative Finishes: Abstract finishes cover patterns, geometric designs, and graphic textures that do not fall into the natural material categories above. They are used in retail and branded commercial environments where a more specific or varied surface look is needed. Matching the Finish to the Space Different building types have different priorities. Here is a quick look at how the thinking changes across common project types. Healthcare Environments In hospitals and clinics, hygiene is the top priority.