Can Architectural Film Be Applied to Curved Surfaces?
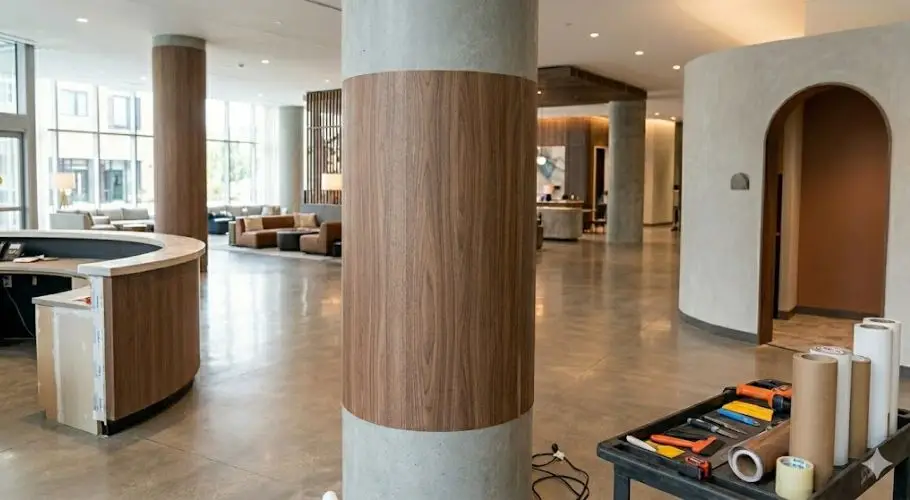
Curved surfaces are common in commercial buildings. Rounded columns, arched doorframes, curved reception desks, rounded cabinet edges. When a space is being updated, people often wonder if architectural film can go on these shapes or if it only works on flat surfaces. The answer is yes, it can. But there are a few things that affect whether it turns out well or starts peeling within a year. Not Every Film Works on a Curve Architectural film is not one single product. Different films are made for different jobs. Some are designed for flat surfaces only. They do not have much stretch, so trying to wrap them around a curve usually causes them to crack or lift at the edges fairly quickly. Other films are made to handle curved and shaped surfaces. These are thinner and more flexible, so they can bend without breaking or losing their grip. The films Resurface Wraps uses, 3M DI-NOC, Reatec, Belbien, and LG Benif, all have options specifically made for curved surfaces. Picking the wrong type for the job is one of the main reasons curved wraps fail early. What the Installer Checks Before Starting A good installer does not just show up and start applying film. Before anything goes on the wall, they look over the surface carefully. This check is what separates a wrap that lasts from one that starts coming apart in a few months. Here is what they are looking at: Surface condition: Any cracks, dents, or rough spots need to be fixed first. Film does not smooth over damage. It follows the shape of whatever is underneath it. Cleanliness: Grease, dust, or moisture under the film will cause it to lift over time. The surface gets wiped down and cleaned before anything is applied. How sharp the curve is: The tighter the bend, the more flexible the film needs to be. The installer checks this to make sure the film they are using can actually handle it. Where the edges will end: Film needs to start and stop somewhere. On a curve, the installer plans where those points will be so the edges do not end up exposed or visible. Where people will be looking: If there is a seam or a join in the film, the installer wants it somewhere that is not going to catch the eye. How the Right Film Gets Chosen Once the surface has been checked over, the installer picks the right film for that specific job. Even within the same brand, there are different options that behave differently. The main things they look at when choosing: How much the film can stretch: some films can stretch more than others before they tear. A tighter curve needs a film with more stretch. How thick the film is: thinner films bend more easily. Thicker ones are tougher but not as flexible. The adhesive: some films can be moved around and repositioned during installation, which helps a lot when working around a curve. The texture of the finish: a deeply textured film is stiffer than a smooth one. On a tight curve, a smoother version of the same finish might work better. The installer looks at all of this before deciding which film to use. The goal is to match the film to the surface, not force a film to do something it was not built for. What a Good Job Looks Like vs. a Bad One It is fairly easy to tell the difference between a curved wrap that was done well and one that was not. Here is what to look for: A good application: The film lies flat with no bubbles or rippling Any joints in the film are tight and placed where they are hard to see The edges are neatly finished and not left raw or exposed The pattern or texture looks even across the whole surface A poor application: Bubbles or lifting, especially at the tightest point of the curve Joins that are clearly visible or have gaps in them Edges that were cut short and left open The pattern looks stretched or warped in places Wrinkles where the film could not handle the bend Why Heat Is Part of the Job Heat is used in almost every curved film installation. Architectural vinyl softens when it gets warm. When an installer uses a heat gun on the film as they apply it, the film becomes more flexible and easier to press into the shape of the surface. Without heat, the film sits under tension. It wants to stay flat, so it pulls against the surface at the edges. Over time that pulling causes the film to lift. After the film is applied, a second pass of heat locks it in place. This stops it from springing back and helps the adhesive bond fully to the surface. Where Seams Go On a flat surface, a seam can usually be tucked into a corner or along a natural edge. On a curved surface, seams need a bit more thought. On a wide gentle curve, the film might cover the whole surface without needing a join at all. On a tighter curve, a join is usually necessary. Good installers plan where seams will go before they start. They aim for spots that are easy to miss: The back of a round column where most people will not be looking Along a shadow line or a natural break in the surface At a point where two panels or materials meet A seam in the right spot is almost invisible. A seam placed without thinking about it tends to stand out. Which Finishes Work Best on Curves Not every finish looks the same on a curved surface as it does on a flat one. Some are more forgiving than others: Solid colors: easiest to work with on curves. No pattern to worry about and seams are harder to notice. Smooth wood looks: works well. Any minor stretch in the texture is usually not visible from
How to Avoid the Most Common Architectural Wrapping Mistakes
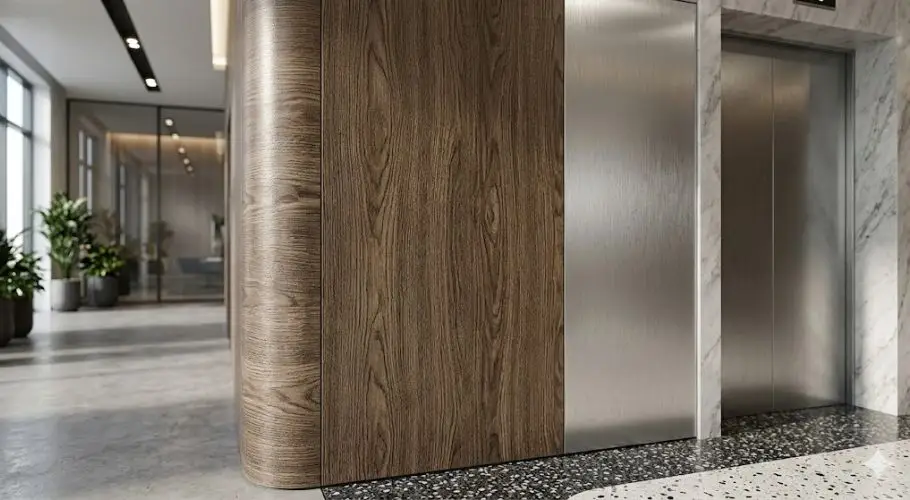
Architectural vinyl wrapping works well when the process is followed correctly. It cuts renovation costs, keeps disruption low, and produces a finish that holds up in commercial environments. But skip a few steps, or rush through a section, and the film starts lifting, bubbling, or looking uneven within weeks. These mistakes are not rare. They happen on commercial projects, hotel renovations, and retail fit-outs all the time. Most of them are preventable. This guide breaks down the most common errors that come up during architectural film installation, and what to do instead. What a Failed Installation Actually Costs A poor installation does not always fail immediately. Sometimes a door wrap looks fine for the first few weeks, then edges start peeling. Or bubbles appear after the first change in temperature. By that point, you are either re-doing the job or living with a result that does not reflect well on the space. On commercial projects, especially in hospitality and healthcare settings, the cost of redoing a job can wipe out the savings that made wrapping the right call in the first place. A failed installation often costs more than just materials. 1. Skipping Surface Preparation This is the most common mistake across the board. Surfaces that look clean to the eye often have invisible grease, dust, or residue that prevents proper adhesion. Architectural vinyl film bonds to the substrate underneath it. If the surface is dirty, the film won’t stick, no matter how hard you press. Even a fingerprint left on a door panel before installation can cause a small lift later. What to do instead: Wipe all surfaces with isopropyl alcohol (IPA) before applying film Let the surface fully dry before starting, even if it looks dry already On porous or rough surfaces, use a manufacturer-recommended primer or adhesion promoter Check for paint peeling, loose coatings, or old adhesive residue and deal with those before wrapping This step takes maybe 15 to 20 minutes per surface. Skipping it can cost hours in rework. 2. Working in the Wrong Conditions Temperature and humidity affect how vinyl film behaves. Most architectural films are designed to be applied at room temperature, somewhere between 60°F and 85°F (15°C to 30°C). Outside that range, things get difficult. In cold conditions, the adhesive gets stiff the film becomes harder to stretch and conform to surfaces. In very high heat, the film can stretch too easily, which leads to distortion, especially around edges and corners. Humidity also plays a role since moisture on the surface prevents the adhesive from sticking fully. What to do instead: Install in a temperature-controlled environment where possible Do not install directly after a room has been cleaned with steam or water unless the surface has had time to fully dry In cold weather, allow the film to acclimate to room temperature before unrolling it Avoid installing in direct sunlight where surface temperatures can be much higher than air temperature On large commercial projects like elevator interiors or wall panels, temperature needs to be managed before installation begins, not treated as an afterthought. 3. Rushing the Squeegee Work Using a squeegee incorrectly causes a large share of bubble and wrinkle problems. The squeegee does two things: it pushes air out from under the film and presses the adhesive firmly against the surface. Both require patience and steady pressure. Going too fast does not give the adhesive time to grip evenly. You end up with micro-pockets of air that are hard to see right away but show up clearly once the film has set. Pressing too hard at the wrong angle can also stretch the film or push wrinkles to the edge instead of out of the panel. What to do instead: Always start from the center of a panel and work outward Use overlapping strokes, each one covering about half the width of the previous stroke Angle the squeegee at about 45 degrees to the surface during application Use a felt-edge or fabric-wrapped squeegee on glossy or delicate finishes to avoid scratching For larger surfaces, divide them into sections and work one section at a time 4. Ignoring Corners and Edges Edges and corners are where most film failures start. They are also the most visible parts of a surface, so a lift or bubble at a corner is immediately noticeable. The challenge with corners is that the film has to conform to a change in direction. If you just fold the film around a corner without the right technique, it creates tension in the material. That tension pulls the edge away from the surface over time, especially in high-traffic areas or places with frequent temperature changes. What to do instead: Use a heat gun to soften the film before conforming it around corners and edges Do not apply heat in one spot for too long, as this can distort the finish or affect the adhesive Pull the film gently as you apply heat, just enough to stretch it around the corner without tearing On inside corners, use a knife or trim tool to make a relief cut so the film lies flat without bunching Seal all edges with a firm squeegee pass, paying attention to the very last millimeter of film at the trim line On surfaces like casework and millwork, which often have more detailed profiles and edges, this step can take longer than the main panel application, and it should. 5. Using the Wrong Film for the Surface Not all architectural vinyl films are the same. Different films are designed for different surfaces, traffic levels, and applications. A film designed for a smooth interior wall may not perform well on a textured door with hardware recesses. A film suited for a low-traffic environment may wear down quickly in a busy hotel corridor. Using the wrong product is a common mistake when someone selects a finish based on looks alone without checking the technical spec sheet. Common mismatches to avoid: table { border-collapse: collapse; border-spacing: 0; width: 100%; border:
How to Spot a Poorly Installed Wrap (and When to Request a Fix)
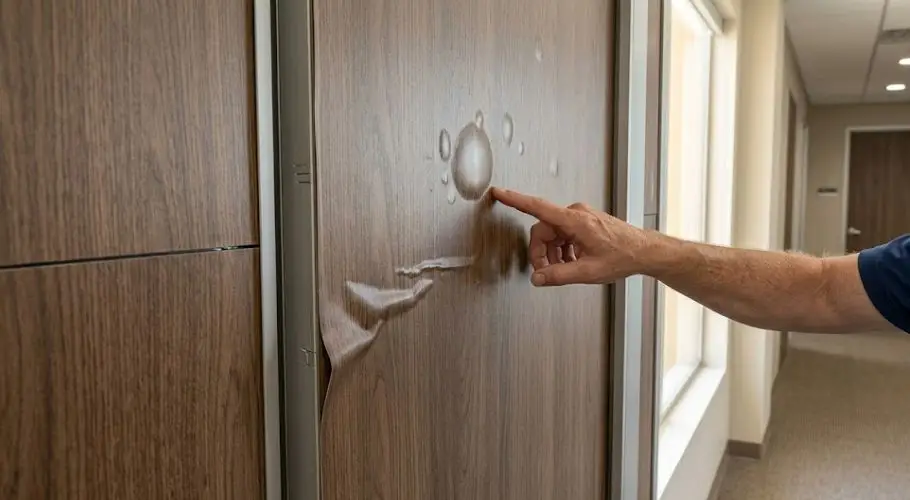
Architectural vinyl film does a lot of heavy lifting in commercial spaces. Hotels, hospitals, offices, and retail stores use it to refresh doors, elevator panels, walls, and millwork without tearing anything out or shutting down operations for days. When the installation is done properly, the result is clean and consistent. Most people walking past a well-wrapped surface have no idea it is not the original material. But a poor install tells a different story. Some problems are obvious from the first day. Others take a few weeks to show up. Either way, knowing what to look for puts you in a much better position to decide whether something needs to be brought back to your installer. What a Good Architectural Wrap Should Look Like A properly installed architectural wrap feels smooth when you run your hand across it. No ridges, no lumps, no sections where the film sits higher than the rest. Edges should lie flat against the surface without any gap between the film and the substrate. Where seams exist, they should fall along natural break lines, not through the middle of a flat panel. The pattern should also stay consistent across the full surface. If you are looking at a door wrap with a wood grain finish, that grain should flow in the same direction from top to bottom. For wrapped elevator panels, the sheen and color depth should look the same near the floor as it does at eye level. Any variation in texture or finish tone is worth a closer look. 7 Signs of a Poorly Installed Architectural Wrap 1. Air Bubbles Under the Film Air bubbles are probably the thing installers get called back for most often. They happen when dust, grease, or moisture is left on the surface before the film goes down, which stops the adhesive from making proper contact. Some bubbles are tiny and easy to miss unless you are right up close. Others are visible from across the room. A small bubble that appears right after installation might flatten out within 48 to 72 hours as the adhesive settles. If bubbles are still sitting there after three days, or if they cover a noticeable area of a panel, get in touch with your installer. 2. Lifting or Peeling Edges Edges are where a wrap starts to fail first, especially in high-traffic areas. Check around door frames, panel borders, and any spot where the film wraps around a corner or curve. If the film is curling up or there is a visible gap between the edge and the surface, the finish step was likely skipped or rushed. Post-heating is what locks the adhesive into edges and curves after the film is applied. Without it, those areas lift over time. On [elevator wraps](https://resurfacewraps.com/elevator-wrap/) and other surfaces that get daily contact, lifting edges tend to spread faster and do more damage if they are not caught early. 3. Wrinkles or Creases Architectural vinyl should lie completely flat. If you see raised lines or areas where the film looks bunched together, it was not worked properly during application. This often happens when film is forced around a complex shape without the right technique or when too much material is pushed into a tight corner without being trimmed. Creased areas collect dirt more easily and the film can crack at the fold point over time. Once a crease is in, it cannot be pressed out. That section needs to come off and be reapplied. 4. Seams in the Wrong Places Using more than one piece of film on a surface is normal. Large panels and complex shapes almost always need multiple pieces. But where those seams are placed matters a lot. A seam running through the center of a flat door panel stands out. Seams should sit inside grooves, along natural panel borders, or at points where they blend with the design. A thick ridge or a visible gap between two pieces usually means the installer did not plan the layout carefully before starting. On wall wraps, seams in the wrong spots are especially obvious under overhead lighting or natural light that hits the surface at an angle. 5. Rough Texture or Trapped Debris Run a hand across the wrapped surface. Even a textured finish like wood grain or concrete should feel smooth in terms of how the film sits on the substrate. If you feel small hard spots or bumps under the film, debris was caught during application. Dust particles, paint chips, or fine grit trapped under the film cannot be removed without taking the whole piece off. This usually means the panel needs a full redo. It also points to the installation not being done in a clean, prepared environment, which is a sign of a rushed job overall. 6. Distorted or Misaligned Patterns Step back and look at the surface as a whole. On finishes like brushed metal or wood grain, the pattern should look uniform from one side to the other. If the grain shifts direction partway across the surface, or the sheen looks washed out in one section, the film was stretched too far during application. Overstretching changes how the finish reads and also weakens the adhesive bond in that area. On casework and millwork with tight angles or recessed details, pattern distortion is one of the more telling signs of poor workmanship. 7. Cut Marks on the Underlying Surface If the installer used a blade directly against the original surface while trimming the film, they may have scored the substrate underneath. This is harder to catch until the wrap is removed, but around corners and panel joints you can sometimes see the edge of a scratch line where the knife went too deep. A professional installer uses tools and techniques that protect the surface below. Cut marks on the substrate are a sign that the proper method was not followed. Quick Reference: Wrap Defects at a Glance Defect
The Essential Guide to Fire Ratings for Architectural Films
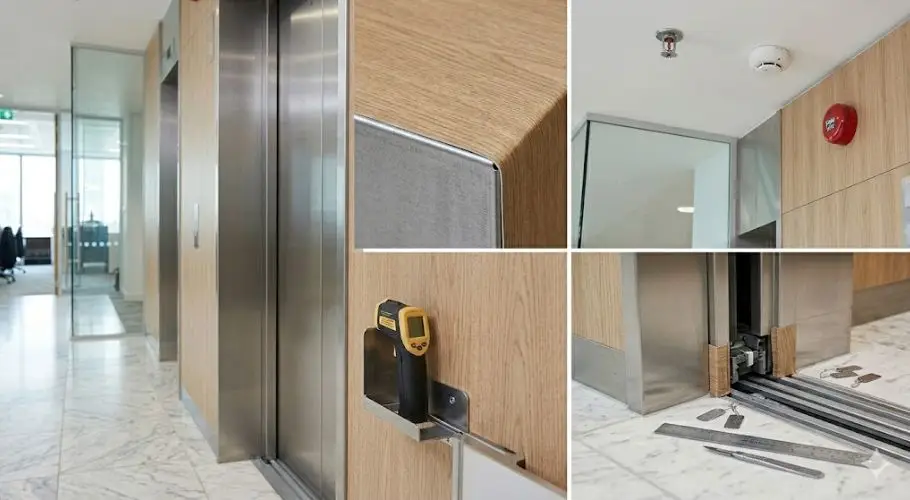
Fire ratings don’t come up much in the early stages of a project. Most of the conversation is about finishes, aesthetics, and lead times. But once a job involves a hospital, a hotel, an elevator, or any kind of commercial renovation, someone will ask about fire compliance. And if you don’t have an answer ready, the project stalls. This guide explains how fire ratings work for architectural films, what the different classes mean, and what you actually need to check before specifying a product. The goal is to make this topic less confusing, not more. What a Fire Rating Actually Tells You A fire rating shows how a material reacts when it comes into contact with flame. It covers two things: how fast fire spreads across the surface and how much smoke the material gives off. Those two results put the material into a class, which then tells you where it can and can’t be used. Building codes use those classes to decide which materials are allowed in which spaces. A material that’s fine for a back office might not be allowed in a public corridor or a hotel lobby. The class system exists so that architects, contractors, and inspectors are all using the same information when they sign off on a job. Testing Standards You’ll Come Across The US and Europe use different systems. In the US, most commercial projects refer to ASTM E84 for surface materials. In Europe, it’s EN 13501-1. If you’re working on a North American project, ASTM E84 is the one that comes up the most. A few standards you’re likely to see: ASTM E84 (US): The standard test for how interior surface materials behave around fire. It scores materials on flame spread and smoke, then places them into Class A, B, or C. NFPA 101: The Life Safety Code. It uses ASTM E84 results to set minimum requirements by building type, including hospitals, hotels, and schools. IBC (International Building Code): Also references ASTM E84. Most US states follow some version of it, sometimes with local additions on top. EN 13501-1 (Europe): Uses a letter rating from A1 down to F. A1 is the best result. F means the material hasn’t been tested or classified. BS 476 Part 7 (UK): Rates surface flame spread from Class 1 to Class 4. Class 1 is the best and is required in most UK commercial interiors. ASTM E84 Class Ratings at a Glance Most US commercial projects work from this table: Class Flame Spread Score Smoke Score Where It’s Used Class A 0 to 25 0 to 450 Hospitals, schools, hotels, high-rise buildings Class B 26 to 75 0 to 450 Offices, general commercial spaces Class C 76 to 200 0 to 450 Lower-risk areas, some smaller retail Unrated Above 200 Above 450 Not for use in commercial interiors Class A is the top level. Regulated environments almost always ask for it. If you’re working on a healthcare project or any kind of hotel renovation, Class A is what the code will ask for in most cases. The Surface You Apply to Changes Everything A film doesn’t get its fire rating on its own. The rating comes from testing the film on a specific surface. A vinyl film tested on steel or drywall can score Class A. Put that same film on untreated wood or a combustible panel and the result may be different. This is something a lot of people miss. When you see a Class A rating on a film’s data sheet, that rating was earned on a particular surface under particular conditions. If your installation is on a different surface, you need to check whether the rating still applies. Ask the manufacturer what surface the film was tested on before you commit to it for a regulated space. Where Fire Ratings Get Checked Most Some spaces have stricter requirements than others. It mainly comes down to how many people use the space and how easy it is to get out in an emergency: Healthcare: Hospitals and care homes have some of the tightest rules around interior finishes. Corridors, patient areas, and elevator lobbies usually need Class A materials. Healthcare installations go through a lot of scrutiny on this. Hotels: Guest corridors, lobbies, and elevator interiors all fall under fire code. For bigger hospitality refurbishments, getting the paperwork in order early saves a lot of back and forth. Office buildings: Depends on the building height and how many people work there. High-rise offices typically need Class A in corridors and reception areas. Schools and universities: Class A is usually required in corridors and any shared spaces. Elevator interiors: These are treated as a high-risk area. Most codes require Class A rated materials on the walls and doors inside a cab. This is relevant to elevator wrap installations in particular. Retail: Bigger stores with high foot traffic have stricter requirements. Smaller boutiques often have more flexibility. How the Main Film Brands Compare The films we work with at Resurface Wraps all have fire rating documentation. Here’s where each one sits: Brand US Fire Class Notes 3M DI-NOC Class A Tested on hard, non-combustible surfaces like steel and drywall LX Hausys Benif Class A Tested on gypsum board and similar surfaces Belbien Class A Varies by product series; check the individual data sheet Koroseal Reatec Class A Class A on qualifying surfaces What to Check Before You Choose a Film A few things worth going through before settling on a product for a commercial project: What class does the code require? Look at the building type and check the relevant code. Know whether Class A, B, or C is needed before looking at products. What surface will the film go onto? Check whether it’s a hard, fire-rated surface or a combustible one. That affects which films are suitable. Does the test match your surface? Ask for the full test report, not just the class label. The test surface needs to match or be close to
Is Architectural Film an Eco-Friendly Renovation Option?
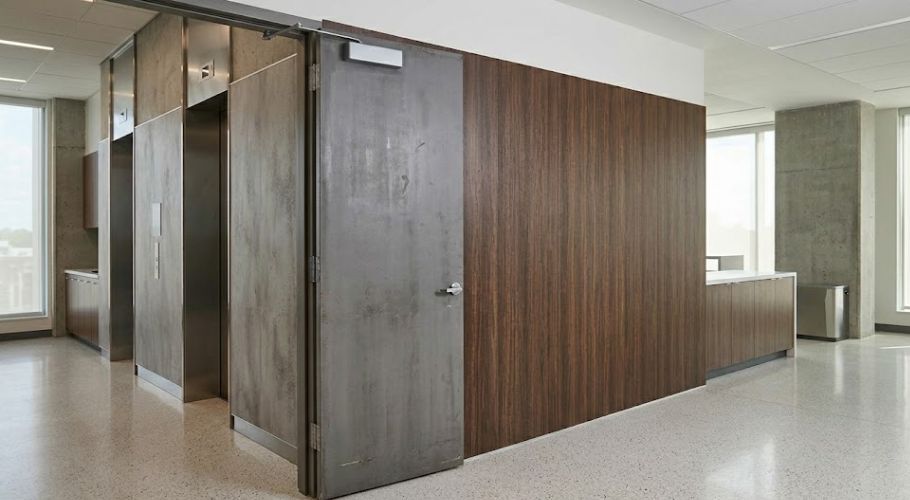
When a space starts looking tired, the default move is usually to tear everything out and start fresh. New doors, new wall panels, new cabinetry. That approach might feel thorough, but it creates a serious amount of waste. Building renovation and demolition account for a large portion of the solid waste that ends up in landfills every year. Replacement materials have to be manufactured, shipped, and installed, and all of that has a footprint. Architectural film takes a different approach. Instead of removing surfaces, you wrap them. The door stays. The elevator cab stays. The wall panel stays. A thin, durable film goes on top, and the space looks updated without any of the debris that comes with full replacement. That basic idea is worth exploring more carefully, because the environmental case for film renovation is stronger than most people realize. What Is Architectural Film? Architectural film is a multi-layered vinyl material built to wrap over existing surfaces. It can mimic the look of wood, stone, metal, concrete, fabric, and more without using those raw materials. The film bonds to a surface through pressure-sensitive adhesive. A trained installer applies it to doors, walls, elevator interiors, ceilings, casework, and other building features. It is used most often in commercial environments. Hotels, corporate offices, hospitals, retail stores, and institutional buildings all use it. The main draws are speed and low disruption. But the environmental angle tends to get skipped over in most conversations about the product. That’s what this post focuses on. Why Traditional Renovation Generates So Much Waste Most people underestimate how much waste a standard renovation produces. A lot of it comes from surfaces that were structurally fine but got replaced because they looked old. Here is where the bulk of renovation waste typically comes from: Removing and discarding doors that work but look worn Pulling out casework and millwork when only the finish has deteriorated Demolishing wall surfaces to replace them with new panels Stripping elevator cabs and sending the old materials to landfill Shipping heavy replacement materials across long distances, adding transport emissions Each of those waste points can be avoided when the structure underneath is still solid. The film wraps around what’s already there, so nothing has to go. How Architectural Film Reduces Renovation Waste The most direct environmental benefit of architectural film is waste avoidance. If a door is structurally sound but looks beaten up, wrapping it with architectural film for commercial doors keeps that door out of the waste stream entirely. The same applies to elevator cabs, wall panels, casework, and ceilings. The original material stays in place. Nothing gets torn out. Nothing goes to landfill. This matters at scale. A hotel renovation might involve hundreds of guest room doors. Replacing all of them creates a large volume of demolition debris, plus the manufacturing emissions tied to producing new units. Wrapping them sidesteps both problems at once. Elevator wraps remove the need for structural cab replacement. Wall wraps change the look of entire corridors without any of the dust or downtime that comes with full wall replacement. The environmental logic is consistent across all of these applications. Other Environmental Benefits to Know Beyond avoiding landfill waste, there are other environmental factors tied to architectural film renovation: No heavy demolition: No jackhammers, no dumpsters outside the building, no clouds of construction dust. Lower transport emissions: Rolls of film are significantly lighter than new doors, panels, or elevator cabs. Less weight means less fuel consumed in shipping. Extended surface lifespan: Quality film protects the surface underneath and delays the next round of replacement. Reduces resource extraction: Wood-look finishes eliminate the need for new timber. Stone-look and metal-look finishes avoid quarrying and smelting. The full range of available finishes covers most design needs without raw material sourcing. Shorter project timeline: Faster installs mean less energy consumed over the course of the renovation. Many commercial projects are completed overnight or in phases without shutting down operations. These gains are not dramatic in isolation. But across a large building or a multi-property renovation program, they add up to a meaningful reduction in impact. What About PVC? Most architectural films are made primarily from PVC, short for polyvinyl chloride. PVC has a mixed reputation in sustainability conversations. It is a plastic, it does not biodegrade, and that is a legitimate concern. But the full picture is more complicated than a simple yes or no on PVC. Durability changes the calculation. A film that holds up for 7 to 12 years on a commercial surface means that surface is not being replaced during that entire period. High-quality films built for commercial use, like those applied in hotel and corporate projects, are made to handle heavy traffic and long service lives. When you compare a PVC wrap to the environmental cost of full surface replacement, including manufacturing, demolition waste, and transport, the film typically comes out ahead. The more useful question is not whether film contains PVC, but whether it lasts long enough to justify its use. In commercial applications, the answer is generally yes. So Is Vinyl Film Wrapping Worth It for Your Space? The five problems above show up in almost every commercial renovation project to some degree. Cost overruns, construction mess, long timelines, design limitations, and surface wear are not rare exceptions. They’re regular parts of the process when you’re working with traditional methods. Vinyl film wrapping doesn’t fix everything. But it does deal with these five problems directly, and it’s been used across hotels, healthcare facilities, retail chains, and corporate offices long enough that the results are well documented. You can browse the full range of applications on the Resurface Wraps site to see what surfaces this works on. If you’re planning a renovation and want to know whether surface wrapping makes sense for your specific project, reach out to the Resurface Wraps team for a project consultation and quote. Where Architectural Film Works Best for Sustainability Goals No renovation product is entirely without environmental impact. Architectural film is a
How to Refurbish Your Office With Vinyl Wrap
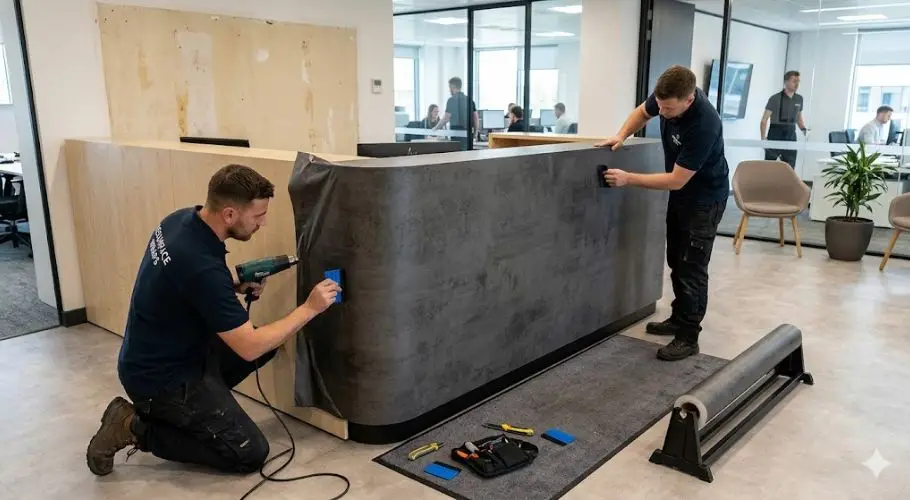
Most office spaces have not changed much in over a decade. Renovation is expensive, takes too long, and shuts down operations while the work is happening. That is why more businesses across North America are using commercial vinyl wrapping to update their offices without a full build-out. This post covers how the process works, which surfaces it applies to, and what to think about when planning a project. Whether the goal is updating a single reception area or refreshing an entire floor, the steps are mostly the same. What Is Office Vinyl Wrapping? Architectural vinyl film is a multi-layer material that bonds directly onto existing surfaces. It comes in finishes including wood grain, brushed metal, stone, concrete, fabric textures, and solid colours. The film is thick enough to cover worn laminate and minor surface damage while fitting cleanly around edges and corners. Application does not involve paint or primers. Installers clean the surface, cut the film to size, and press it on using heat tools. The surface is usable the same day. Most commercial office projects are done within a few days, which matters when the business cannot be closed for extended periods. Why Offices Use Vinyl Wrap Traditional office renovation usually means replacement. Old doors come out, new ones go in. Cabinets get rebuilt. Walls get painted. Each step adds cost, time, and disruption. Vinyl wrapping keeps the existing surfaces in place and applies a new finish directly over them. What that means in practice: Lower cost: No demolition, no disposal, no replacement materials. You pay for the film and installation, not a full rebuild. No shutdown needed: The work is quiet and clean. Most offices stay open during installation. No dust, no fumes. Fast turnaround: Jobs that would take months through traditional renovation are done in days. Removable: The film comes off without damaging the surface underneath. That matters for businesses in leased spaces that need to restore the property before moving out. Durable: Commercial-grade film resists scratches and cleans easily. It does not peel or lift under regular daily use. Wide finish range: Wood, metal, stone, fabric effects, and solid colours are all available. There is enough variety to fit most interior directions and brand requirements. Which Office Surfaces Can Be Wrapped? Most people assume vinyl wrap is mainly for furniture. It covers a lot more than that. Doors Office doors take constant use and show wear faster than most surfaces. Scratches, chips, and fading are common. Commercial door wraps change the look of a door without replacing the frame, hinges, or hardware. They are one of the most common starting points in an office refurbishment because the impact is immediate and visible to every person who walks in. Walls and Panels Wall surfaces, partition panels, and feature walls can all be wrapped. Stone-effect films are common in reception areas and boardrooms. Wood-grain films suit meeting rooms and break-out spaces. The wall wraps service covers full-wall applications and individual panel sections depending on what the office needs. Casework and Millwork Reception desks, built-in cabinets, storage walls, and other millwork can be wrapped. Old laminate that is chipped or faded can look current again with new film applied directly over it. This avoids the cost and waste of ripping out and replacing built-in furniture that is structurally fine. In retail and corporate offices, casework is often one of the highest-contact surfaces in the building, so updating the finish adds both appearance and protection. Elevator Interiors and Landings In multi-floor office buildings, elevators get heavy use and show it quickly. Scratched panels, dull interiors, and the old, damaged wall panels can all be resurfaced without removing or replacing the elevator structure. Elevator interior wraps and elevator landing wraps are often handled together as part of a larger office update. Ceilings Architectural ceiling wraps are possible where access allows. Less common than walls and doors, but useful in offices with exposed ceiling panels that are being updated alongside the rest of the space. Benefits of Using Vinyl Wrap in Your Office Vinyl wrapping works for office refurbishment for specific, practical reasons. Here is what makes it a sensible option for commercial spaces: No construction noise or mess: Installers use heat tools and squeegees, not power tools or sanders. There is no paint, no dust, and no fumes. The team cleans up after each session and the office stays functional throughout. Covers existing wear without replacement: Scratched laminate, faded woodgrain, chipped reception desks, the film goes directly over all of it. The original surface stays in place. You are not buying new furniture or fitting new doors, you are giving what is already there a new finish. Adds a layer of protection: Once applied, the film protects the surface underneath from further damage. Doors and casework that take daily contact are more resistant to new scratches and marks than they were before wrapping. Less waste than traditional renovation: A standard refurbishment sends a lot of usable furniture to landfill. Vinyl wrapping keeps existing structures in place. The film is made to measure, so offcuts are minimal. For businesses with sustainability commitments, that matters. Fire rated for commercial use: Commercial-grade architectural film meets the fire ratings required for office environments. This is a requirement in most commercial buildings, and the materials used satisfy those standards. Achieves a premium look at lower cost: Wood grain, marble, concrete, and metal-effect finishes look close to the real material. A reception desk wrapped in a stone or concrete effect reads as a high-quality finish to anyone walking in. The gap between the cost of real materials and vinyl is significant. Can be done in phases: Not every area needs to be done at once. Wrap the reception area and entrance corridor now, then come back to elevator landings or back-office casework later. Each phase is independent and the office keeps running throughout. Easy to maintain: Wrapped surfaces clean easily with a soft cloth and mild cleaner. There is no special upkeep, no refinishing, and no
5 Renovation Problems That Vinyl Film Wrapping Solves
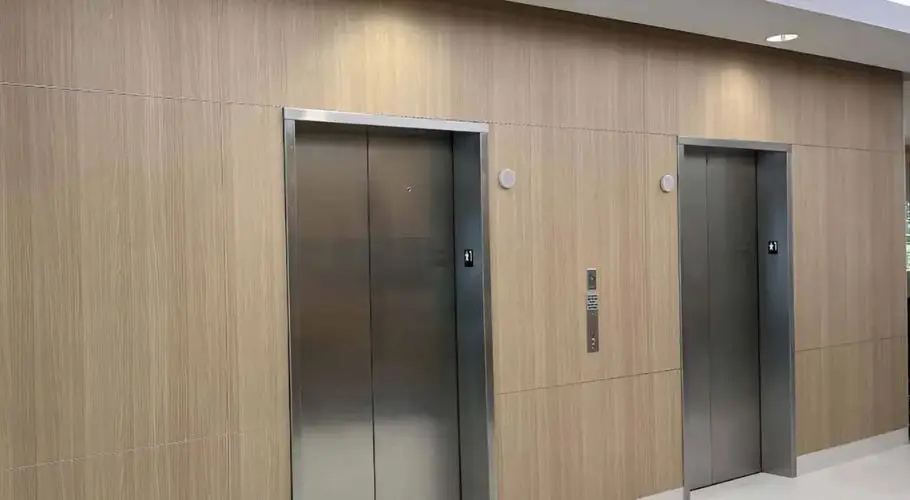
Commercial renovation rarely goes the way you plan. Budgets go sideways. Timelines stretch. Guests complain. Staff struggle to get work done with workers around every corner. If you’ve managed a facility through a full renovation before, this probably sounds familiar. And even with good planning, things tend to go wrong somewhere. Architectural vinyl film wrapping works differently. Instead of ripping out surfaces and starting from zero, you apply high-grade vinyl film directly over what’s already there. Hotels, hospitals, retail stores, and corporate offices have been using this approach for years. It keeps growing because it fixes a lot of the problems that traditional renovation creates. Here are five of the biggest ones. Problem 1: Renovation Costs Grow Fast and Go Over Budget Why the Bill Always Ends Up Higher Than Expected Cost overruns are one of the most common renovation complaints. You get a quote, approve the budget, and then a few weeks in, the number starts climbing. Hidden damage behind walls. Extra labor hours. Materials that take longer to source. One change order turns into three. By the end, the final bill can be double the original estimate. Vinyl film wrapping skips most of what drives those extra costs. There’s no demolition. Surfaces stay in place. Installation is fast, which means less labor time overall. The difference shows up most clearly when you look at something like commercial door wraps compared to full door replacement: Solution Typical Cost Install Time Architectural Vinyl Wrap $350 to $600 per door About 30 minutes per door Full Door Replacement $800 to $2,000+ per door Several hours to days That gap adds up fast. And it’s not just doors. The same cost savings show up when you’re resurfacing: Walls and wall panels instead of full drywall replacement Elevator cabs and landings instead of pulling out metal panels Casework and millwork instead of ripping out cabinets and built-ins Storefronts and building exteriors instead of full structural updates For a hotel updating 200 room doors, wrapping instead of replacing can save over $200,000 on that one task alone. Actual projects confirm it. At Faro Blanco in the Florida Keys, resurfacing 250 doors with architectural vinyl saved the property roughly $250,000 in renovation costs. Problem 2: Dust, Fumes, and Mess Shut Down Active Spaces Traditional renovation is a dirty process. Sanding creates dust that coats everything nearby. Paint fumes take days to clear out, especially in enclosed spaces like hotel corridors or hospital wings. Entire sections of a building often need to be closed off while workers move around with equipment, ladders, and materials. For a hotel, that means rooms out of service. For a hospital or clinic, it can mean shuffling patients and staff. For a retail store, it means customers walking past a construction zone instead of a finished space. The mess itself isn’t just annoying. It costs money in lost business and extra cleaning. Vinyl film wrapping is a much cleaner process. There’s no sanding involved. No paint. No chemical odors. The film applies directly to the existing surface with minimal noise and almost no mess. A wall surface wrap or door update can usually be done while the rest of the floor stays open. That’s why properties like Four Seasons locations were able to have 90 elevator landings resurfaced without taking the hotels offline at any point during the project. The work happens around operations, not instead of them. Problem 3: Projects Run Way Longer Than the Original Timeline How Vinyl Film Wrapping Keeps Renovation on Schedule Construction delays are almost expected at this point. One trade waits on another to finish. Materials get backordered. Exterior work gets rained out. A two-week project turns into six, sometimes eight. And every extra week costs money and patience. Vinyl film installation runs on a very different schedule. Here’s what makes it faster: No removal needed: The film goes over existing surfaces. No teardown, no disposal. Doors stay on their hinges: Each door takes about 30 minutes to wrap, so a whole floor of hotel doors can be done in a single day. Elevator interior wrapping is far quicker: than replacing metal cab panels, which requires taking the elevator out of service for extended periods. No curing time: Unlike paint or adhesives that need to dry, vinyl film is ready to use almost immediately after installation. Work can move through a building in phases: Floor by floor, room by room. The rest of the space keeps running. At DHL headquarters in South Florida, Resurface Wraps transformed lobby walls, panels, columns, and elevators with zero downtime for the facility. A full traditional renovation would not have allowed that. Problem 4: Getting the Right Look Is Harder and More Expensive Than It Should Be Design flexibility sounds easy on paper. In practice, it’s one of the trickier parts of commercial renovation. Matching textures across dozens of surfaces is hard when you’re working with natural materials. Real wood panels cut from the same tree can still look different from one another. Natural stone is heavy, expensive, and difficult to install uniformly. Custom finishes with real materials cost more, take longer, and still don’t always deliver the consistent result you’re after. Vinyl film wrapping gives you a much wider range of design options for a lot less money. The full library of available finishes covers wood grain, brushed metal, concrete textures, marble, solid colors, stone looks, and abstract patterns. Because the film is manufactured, the color and texture stay consistent from panel to panel, whether you’re doing 10 surfaces or 100. Swarovski used architectural vinyl wrapping to shift the interior of five store locations from white to pink as part of a rebrand. The whole job was done overnight, without closing a single store. Doing that through traditional renovation would have taken months and cost far more. You can see more examples of this kind of work in the project portfolio. Problem 5: Surfaces Wear Out and Become a Maintenance Headache Why High-Traffic Spaces Need Something More Durable
Architectural Film Wrapping Myths Debunked: What Most People Get Wrong
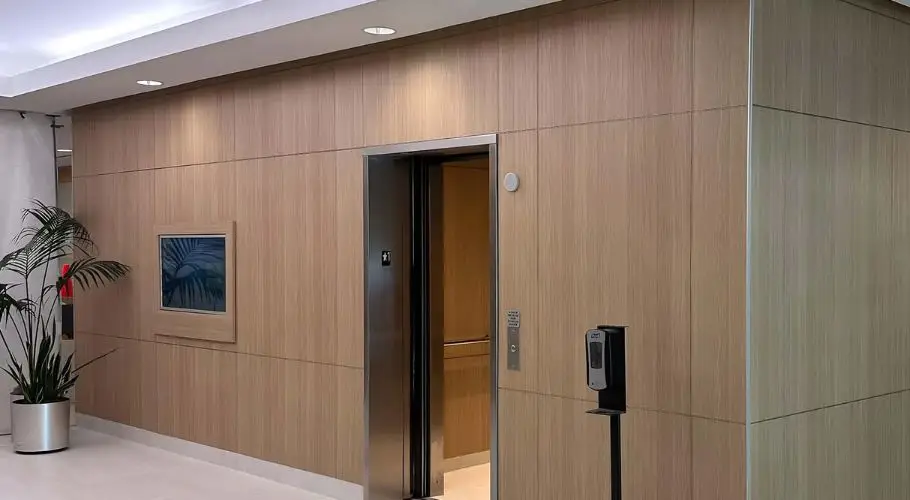
A lot of people hear “film wrap” and picture car wraps. Makes sense. But architectural film wrapping is not the same thing at all. It uses thick, commercial-grade vinyl film to resurface surfaces inside buildings. Things like doors, elevator panels, walls, and millwork. The result looks nothing like a sticker. But the myths around it keep spreading anyway. Most of the confusion comes from people mixing it up with cheaper DIY materials or auto wrap vinyl. Some of it is just old information passed around without anyone checking. This post goes through the most common myths and gets into what’s actually true. Myth 1: Architectural Film Wraps Don’t Last Very Long People push back on this one the most. If it’s a film, it peels off fast, right? Not the commercial-grade version. A few things worth understanding: Thickness matters: Commercial architectural films are far thicker and denser than the vinyl used in signage or car wraps. They’re built to take daily punishment. UV resistance is built in: Quality films resist fading even in brightly lit commercial spaces with constant light exposure. Heat tolerance is real: Good film handles the temperature changes that happen in lobbies, hallways, and elevator cabs without bubbling or lifting. Expected lifespan is 7 to 15 years: in most commercial settings, when the surface was prepped properly and the install was done right. Maintenance is simple: Regular cleaning with standard products keeps the surface looking good for years. The lifespan comes down to installation quality and surface prep more than anything else. A bad install shortens the life of any wrap. That’s on the installer, not the film Myth 2: It Only Works on Flat Surfaces People assume film wrapping is only practical on large flat walls or smooth panels. But installers apply it to curved surfaces, door edges, ridged panels, elevator columns, and millwork with all kinds of angles and depths. The film is flexible enough to conform to different shapes when the person applying it knows what they’re doing. You can’t just press it on and call it done. This is a big part of why commercial door wraps work so well. Doors have edges, bevels, recessed panels, and varying depths. The film wraps around them cleanly without seams showing. Same story with elevator interior wraps, where walls, trim panels, and ceilings all need to line up. Flat-only is a very limited reading of what this product can handle. Myth 3: Architectural Film Is Just a Temporary Fix A lot of facility managers treat film wrapping like a stopgap. Something you do while saving up for a real renovation. That idea doesn’t hold up when you look at how it actually gets used. A few examples: Many projects are permanent installations: Hotels, hospitals, and corporate offices install film wraps as a long-term finish, not a placeholder while they wait for something better. The film protects the surface underneath: It shields the original substrate from daily wear, which can actually extend its life. Brands use wraps to rebrand across locations: When a chain updates its look, film wrapping is how they get consistent finishes across multiple sites without demolition. Some applications are functional, not just cosmetic: Certain film types are easy to disinfect and resist bacteria. That’s why they’re used in healthcare settings as a real material decision, not a workaround. Calling it temporary says more about the assumption than it does about the product. Myth 4: Removing Vinyl Film Will Damage the Surface Underneath Property managers worry about this one a lot. The fear is that peeling the film off will tear paint or wreck the substrate. That’s not usually what happens. Commercial films use a pressure-sensitive adhesive made to come off without leaving permanent damage. When removed correctly, the surface underneath comes away clean. That said, there are some exceptions. Surfaces that are already peeling, poorly painted, or in bad condition before installation are harder to remove film from cleanly. That’s why surface prep before installation matters as much as it does. On a properly prepared substrate, removal tends to go fine. Myth 5: The Finish Options Are Limited If you’ve never looked at a commercial architectural film catalog, it’s easy to assume there are maybe a dozen plain colors to pick from. The range is actually much wider than that. The main categories include: Wood grain finishes: replicating oak, walnut, maple, teak, and other species Metal finishes: including brushed steel, aged brass, copper tones, and matte chrome Stone and concrete looks: like marble, travertine, and polished concrete Solid colors: in matte, satin, and high-gloss sheens Fabric textures: that replicate linen and other woven materials Abstract and geometric patterns: for more distinctive design needs The finishes page shows the full catalog and is worth looking through before drawing any conclusions about what’s available. Most commercial projects find something that fits without having to settle. Myth 6: Film Wrapping Is Too Expensive to Make Sense The comparison people make here is usually the wrong one. They’re stacking professional film installation up against a can of paint or a roll of peel-and-stick film. Yes, it costs more than painting per square foot. But the right comparison is against full replacement or a traditional renovation, not against DIY materials. Against that comparison, wrapping almost always comes out cheaper. Replacing 250 hotel room doors means new hardware, new frames, and significant labor. Wrapping the existing doors in place costs far less. That same gap holds for wall surface updates, elevator cab renovations, and casework refinishing. And beyond materials, you also skip demolition, disposal, construction noise, and the downtime a full renovation brings. For a hotel staying open or a hospital that can’t shut a wing down, that alone often covers the cost of the whole project. Myth 7: Vinyl Wrap Can’t Handle High-Traffic Areas The worry is that film will scratch, bubble, or wear out fast in busy spaces. That’s a fair concern if you’re thinking about thinner consumer films. Commercial architectural film is a different product.
Why Modern Commercial Spaces Are Swapping Real Wood for Vinyl Film
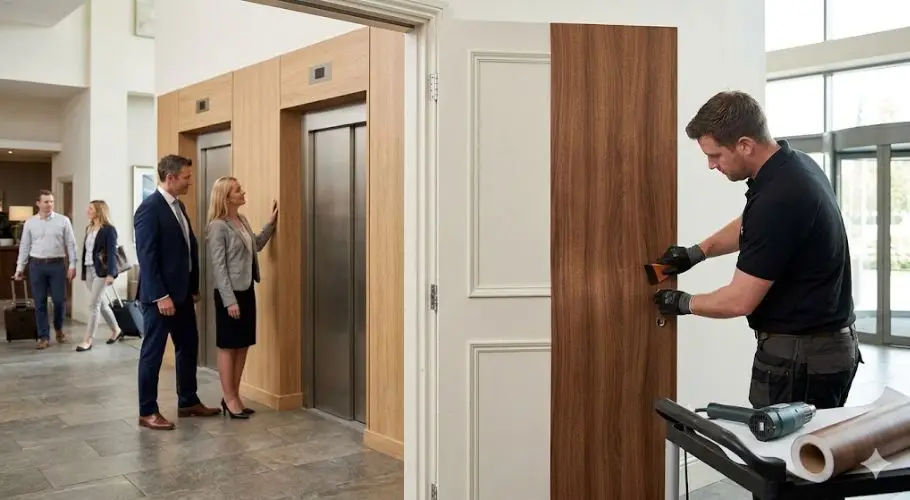
Wood has always been a popular choice for commercial interiors. Hotels, offices, retail stores, hospitals, all of them. Managers and designers have spent years trying to get that warm, natural wood look inside their buildings. But real wood is expensive. It needs maintenance. It warps, it scratches, and it takes a long time to install. That’s a real problem when you’re running a business and can’t afford weeks of downtime. A growing number of commercial spaces are now turning to something different. Architectural vinyl film, sometimes called wood grain vinyl wrap or wood effect vinyl film, has become a common option for interior renovations. It looks like real wood. It feels textured. And it goes on surfaces that already exist, so you don’t have to tear anything out. That shift is happening across industries, and the reasons behind it are fairly easy to understand. What Makes Wood Effect Film Resemble Real Timber? Most people who haven’t seen modern wood effect film up close picture it as a glorified printed sticker. That was closer to the truth ten or fifteen years ago. But the way these films replicate timber now involves more than printing a wood pattern onto a flat surface. The grain patterns come from high-resolution printing that follows the natural variation you’d find in real wood. No two panels look identical, which is how real timber behaves. The surface is also physically embossed, so the texture you feel with your hand lines up with the grain you see with your eye. That pairing of printed grain and physical texture is what separates modern film from older decorative vinyl. When someone walks through a renovated lobby or hotel corridor, they’re taking in the space as a whole, not leaning in to check individual surfaces. A well-applied wood grain finish reads the way it’s supposed to from that distance. The films also cover a wide range of timber looks, from lighter oak and ash tones to darker walnut and wenge, so there’s enough variety to fit most design directions. The Problems With Real Wood in Commercial Settings Real wood is beautiful. Few people would dispute that. But using it in a commercial renovation brings a set of problems that most building managers and facilities teams would rather avoid. Here’s what working with real wood typically looks like in a commercial project: High upfront cost: Solid wood and quality veneers cost a lot. Material costs alone can be significant, and that’s before labor. Long installation time: Carpenters, finishers, and painters all need to come in. That means days or weeks of noise, dust, and disruption. Business downtime: Hotels can’t rent rooms under renovation. Retail stores lose sales. Corporate offices lose productivity. Every day closed costs money. Maintenance over time: Real wood scratches. It reacts to humidity and temperature changes. Refinishing it costs more money down the road. Limited flexibility: If you want to change the look in five years, you’re looking at another full renovation. These aren’t minor inconveniences. For a large property like a hotel with hundreds of doors or a corporate building with dozens of elevator landings, the costs and timelines grow fast. It’s one of the main reasons commercial door wraps and surface films have started replacing traditional carpentry work. Why Wood Grain Vinyl Wrap Makes Sense for Commercial Spaces The Look Holds Up The most common concern about vinyl film is whether it genuinely looks like wood. It’s a fair thing to question. Early versions of decorative vinyl film did look off. You could tell it wasn’t real. The technology has changed a lot since then. Modern architectural vinyl films combine high-resolution printing with embossed surface textures. When you look at a textured wood grain finish on a door or wall panel today, the grain pattern reads naturally, the texture has depth, and the surface doesn’t look flat or plasticky. People moving through a renovated lobby or hotel corridor generally don’t notice the difference. That’s the whole point. Installation Is Fast and Clean Unlike traditional renovation, applying architectural vinyl film doesn’t involve saws, nail guns, or dust. A trained installer works directly with the existing surface. The film goes on cleanly. No demolition, no construction mess, no extended closures. For businesses that can’t stop operating, that’s a significant difference. A hotel can have 250 room doors resurfaced floor by floor while guests are still staying in the building. A corporate office can have its lobby walls and elevator interiors done over a weekend. A traditional wood renovation doing the same scope of work could shut things down for months. The time saved is often reason enough to go this route. The Cost Gap Is Real Traditional renovation projects in commercial buildings can run into the hundreds of thousands of dollars once you factor in materials, skilled labor, and lost revenue during closure. Vinyl film installation typically costs considerably less. Part of that comes from labor. Wrapping an existing surface takes less time than replacing it. Part comes from materials. Premium architectural film costs less than premium wood. And a large portion comes from not losing revenue while the work is happening. When the business stays open during installation, there’s no income gap on top of the renovation bill. Over the life of a property, the difference adds up. Feature Real Wood Wood Grain Vinyl Film Installation Time Long (days/weeks) Fast (hours/days) Cost High Lower Maintenance High (refinishing needed) Low Durability in Commercial Use Moderate High (scratch resistant) Downtime Required Yes Minimal to none Design Flexibility Limited High variety of finishes Replacement Ease Difficult Easy and removable Where Commercial Spaces Are Using Wood Effect Vinyl Film There are quite a few surfaces where wood effect film gets used. Here are the most common ones: Doors : Commercial doors take constant abuse. Wrapping them in wood grain vinyl gives them a fresh appearance without touching the hardware or frame. Wall panels and accent walls: Wall surfaces in lobbies, corridors, conference rooms, and waiting areas work well with a wood
Architectural Film vs. Laminate: Which Is Better for Commercial Buildings?
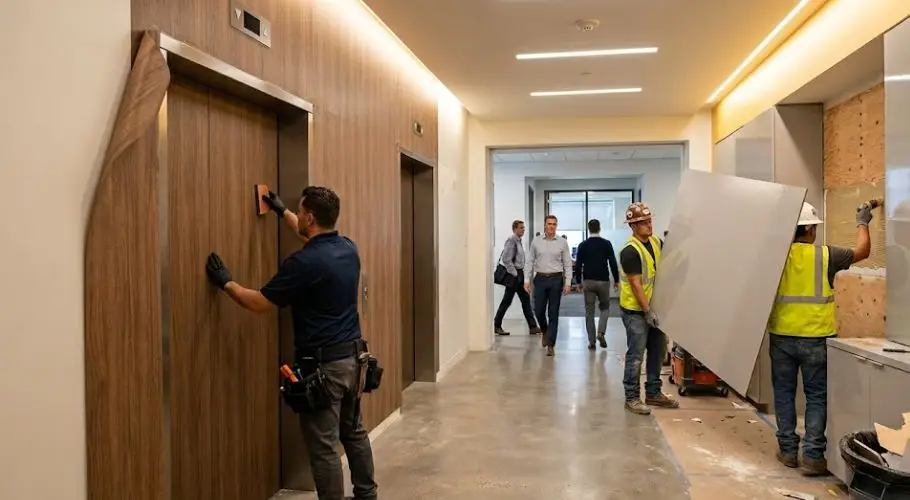
If you are planning a renovation for a commercial building, you have probably looked at architectural film and laminate. Both can change how a space looks. But they are very different materials. Choosing the wrong one can cause problems that go beyond the finished surface. Here is a simple breakdown of what each material is, where it works well, and how the two compare in real commercial settings. What Is Architectural Film? Architectural film, also called vinyl wrap or architectural vinyl, is a flexible, self-adhesive sheet made from high-grade PVC. It goes straight onto an existing surface without removing or rebuilding anything underneath. The surface below stays in place. The film sticks to it. The material comes in a wide range of finishes, from wood grain and stone to brushed metal, fabric textures, and solid colours. Good quality films are not just flat prints. They have physical texture built into the surface, so you can feel it, not just see it. Many architectural films also carry fire ratings, which is a real requirement in hotels, hospitals, and office buildings that must meet commercial building codes. What Is Laminate? Laminate is a hard sheet made by pressing layers of paper and resin together under heat. It has been used in commercial interiors for decades. You have probably seen it on kitchen counters, office furniture, or retail shelving. It comes in two main types. High Pressure Laminate (HPL) is the stronger of the two. It handles impact, heat, and scratches reasonably well. Low Pressure Laminate (LPL) is thinner and used for lighter jobs like cabinet doors. Both have to be cut to size and glued to a base material, usually MDF or plywood, before they are installed. That work happens in a shop or as part of a full renovation, not on-site over existing surfaces How They Compare Here is how the two materials stack up across the things that matter most in a commercial project. Feature Architectural Film Laminate Installation method Applied over existing surfaces on-site Cut and bonded during manufacturing or full renovation Installation time Hours per surface Days to weeks per project Flexibility Wraps curves, edges, and 3D shapes Rigid sheet, cannot bend Design options Hundreds of textures and finishes Good variety but limited by sheet formats Fire compliance Many films meet Class A or commercial-grade fire ratings Varies; often needs extra treatment Repairability Damaged sections can be rewrapped on their own Usually requires full panel replacement Business disruption Minimal. Can be installed in occupied spaces High. Often requires closures or shutdowns Weight Lightweight Heavier, adds load to the surface Sustainability Resurfaces existing material, cuts down on waste Replacement generates a lot of material waste Cost Lower overall for renovations and refurbishments Higher due to building and site preparation How Installation Works in a Real Building Laminate sounds familiar and solid. That can make it seem like the safer choice. But in an occupied commercial building, the installation process creates real problems. Laminate work means cutting panels to size, preparing base materials, and shutting down the area being worked on. That could mean closing a hotel floor, blocking off a hospital corridor, or pulling staff out of an office wing for days. That disruption adds cost that does not always show up on a quote. Architectural film goes on over what is already there. A commercial door wrap can be done in hours. An entire elevator interior can often be finished overnight. For buildings that need to stay open during a project, that difference is what makes certain renovations possible at all. Which One Lasts Longer? Many people assume laminate wins on durability because it is hard and has been around for a long time. That is not always the case. Commercial-grade architectural film is built for heavy use. It holds up against moisture, cleaning chemicals, UV exposure, and impact. Many manufacturers offer warranties of 10 years or more. Laminate is strong, but it chips and cracks at edges and corners, which is exactly where it takes the most wear in a busy space. When a laminate panel chips, you usually have to replace the whole thing. With film, you can rewrap just the damaged section without touching anything around it. In a busy corridor or a high-traffic elevator interior, being able to fix one section at a time saves money and keeps things looking clean. Design Options for Commercial Spaces The look of a lobby, a corridor, or a reception area says something about the business inside. Both materials offer design choices, but not the same ones. Laminate: Available in solid colors, wood effects, and some textures Pattern and color are built into the sheet for consistency Limited to flat surfaces and straight edges Cannot go around columns, curved panels, or detailed millwork Architectural Film: Hundreds of finishes including wood, stone, metal, leather, fabric, and abstract patterns Flexible enough to go around curves, rounded corners, columns, and 3D shapes Can cover wall surfaces, doors, ceilings, elevator panels, casework, and storefronts Embossed finishes feel like the actual material, not just a flat print For corporate offices or hospitality properties where a finish needs to run across different surface types, film handles that better. Fire Ratings and Commercial Code Compliance Commercial buildings have fire safety rules that go well beyond what applies in homes. Hotels, hospitals, airports, schools, and offices all operate under codes that cover what materials can go on walls, ceilings, and other interior surfaces. Many architectural films are tested and certified to meet commercial-grade fire standards. In the US, Class A fire ratings under ASTM E84 are commonly required for occupied commercial spaces. Resurface Wraps selects products that line up with commercial code requirements, and you can check fire rating details on their resources page. Standard laminate panels often do not carry those ratings without extra treatment, which adds time and cost to a project. Where Architectural Film Gets Used in Commercial Buildings Film gets applied to more surface types than most people expect going into
How to Clean and Maintain Door Wraps Without Damaging the Finish
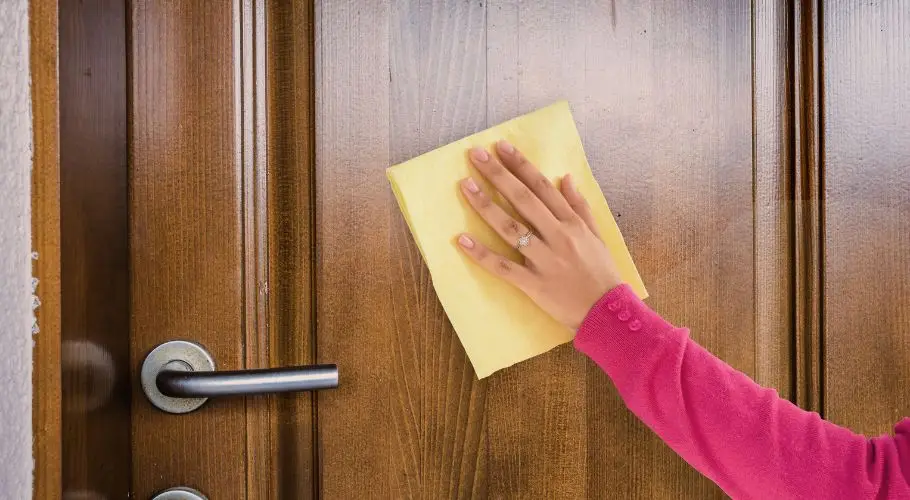
Architectural vinyl door wraps are a smart investment. They refresh worn or outdated doors without the cost of full replacement, and when properly cared for, they can last well over a decade. But like any surface finish, they need some basic attention to stay looking good. The good news is that maintenance is straightforward. You do not need special equipment or expensive products. A consistent routine is all it takes to protect the finish and get the most out of your door wrap investment. Why Proper Cleaning Matters for Vinyl Door Wraps Architectural vinyl films used in commercial door wrapping, like 3M DI-NOC, Belbien, Reatec, and Benif by LX Hauslys, are built for high-traffic environments. They are abrasion resistant and designed to handle daily wear. But the finish can still be damaged by the wrong cleaning products or techniques. Harsh chemicals break down the protective top layer of the film over time. Abrasive scrubbers leave fine scratches that dull the surface. Even water left sitting on seams can work its way under edges if the wrap is not dried properly. None of this is hard to avoid once you know what to watch for. What You Need for Regular Cleaning Keep it simple. You do not need anything fancy. A soft microfiber cloth or a clean, non-abrasive sponge Mild dish soap or a pH-neutral all-purpose cleaner Warm water A second dry microfiber cloth for buffing Avoid anything that contains bleach, ammonia, acetone, or strong solvents. These can lift the adhesive, discolour the film, or damage the finish permanently. Steel wool, rough scrubbing pads, and stiff brushes are also off-limits. How to Clean Door Wraps Step by Step Regular cleaning prevents dirt and grime from building up and becoming harder to remove. Once a week is a good baseline for doors that see moderate foot traffic. Step 1: Wipe down the surface: Mix a small amount of mild dish soap with warm water. Dampen your microfiber cloth and wipe down the door in gentle, even strokes. Work top to bottom so loosened dirt does not drip onto areas you have already cleaned. Step 2: Tackle stubborn spots: For grease marks or fingerprints that do not come off with soapy water, a small amount of isopropyl alcohol on a clean cloth usually works. Apply it to the cloth first, not directly to the wrap. Wipe gently and do not scrub hard along the edges where the film meets the frame. Step 3: Rinse and dry: Wipe the surface with a clean damp cloth to remove any soap residue. Then dry the door immediately with your second cloth. Do not let water sit on the surface, especially near the edges or seams. Moisture that gets under the film at the edges can weaken the adhesive over time. Paint has a lower upfront cost, but that advantage disappears once you factor in the frequency of touch-ups and service interruptions over a few years. Vinyl costs more once but holds up far longer. Keeping Edges and Seams in Good Shape The edges are the most vulnerable part of any door wrap. This is true whether you are looking at commercial door wraps on hotel corridors or wrap applied to interior office doors. Check the edges every few months. If you notice any lifting or peeling at the corners, deal with it quickly. A small amount of appropriate adhesive or edge sealant can press the film back down before the problem spreads. Left untreated, a lifting edge allows moisture and air behind the film, which speeds up further peeling. Run your finger along the seams during your regular cleaning routine. If anything feels loose or raised, flag it for repair. Catching issues early is much easier and cheaper than addressing a large area of detached film later. Preventing Damage Before It Starts A few simple habits go a long way toward keeping door wraps in good condition. Avoid direct heat sources near wrapped doors: Sustained heat from nearby appliances, vents, or open dishwashers can cause the vinyl to bubble or warp. Keep humidity in check: High moisture environments accelerate edge lifting and can cause discoloration over time. Good ventilation in the surrounding space helps. Protect from prolonged sun exposure: UV light fades vinyl finishes over time. Where possible, use window film or blinds on nearby glass to reduce direct sun hitting wrapped surfaces for hours at a time. Be careful with cleaning equipment: Floor mops used near the base of a door can catch on the bottom edge of a wrap. Take extra care around the lower portion of wrapped doors, especially in areas where wet mopping is routine. Wipe up spills immediately: Liquid sitting against the base of a door or pooling near seams is one of the more common causes of early wrap failure in commercial settings. Quarterly Checks: What to Look For A quick inspection every three months takes only a few minutes and gives you a chance to catch small issues before they become larger ones. Walk through each wrapped door and look for the following: Peeling or lifting at corners, edges, or around door hardware Bubbles or raised sections in the middle of the film Discoloration, dull patches, or fading in specific areas Scratches or scuffs that have broken through the top surface of the film Any gaps or cracks along seams where the film meets the frame If you spot bubbles near the edge, they may be from moisture or heat. Small bubbles sometimes flatten out on their own in a temperature-controlled environment. Larger bubbles or those near the centre of the door may need professional attention. When Wraps Need Professional Assessment Architectural door wraps installed by certified professionals, like the 3M DI-NOC endorsed installer program that Resurface Wraps operates under, are built to last 10 to 15 years in indoor environments. But even durable materials benefit from a professional eye now and then. Consider getting a professional assessment if you notice widespread fading, adhesive failure across multiple doors,
Elevator Wraps vs Paint: Why Vinyl Is Better for High-Traffic Elevators
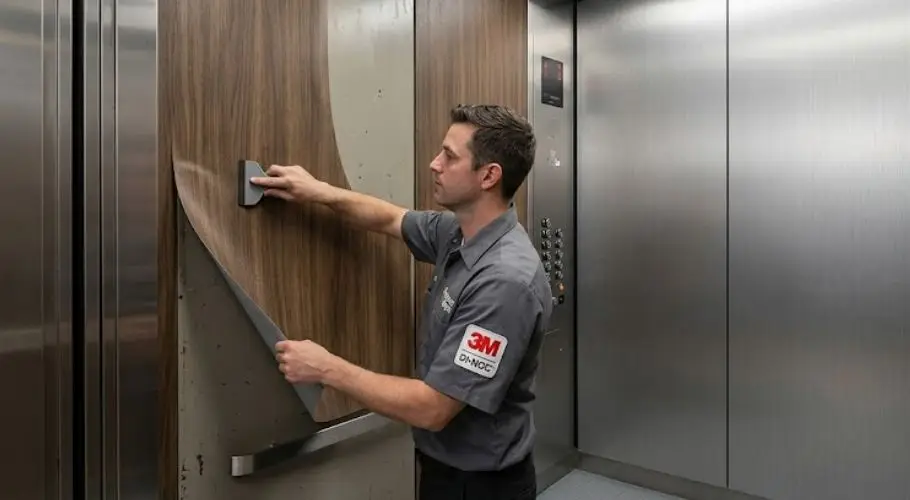
If you manage a commercial building, a hotel, or a healthcare facility, you already know how fast elevator interiors take a beating. Constant foot traffic, luggage, carts, and general wear add up fast. At some point, you have to do something about it. Most people default to repainting. But paint is not really built for elevator cabins, and the results rarely hold up the way you need them to. Architectural vinyl wraps have taken over as the preferred option for facilities managers, interior designers, and building owners across the country. They look better, last longer, and cost far less than a traditional repaint cycle or full renovation. This post breaks down the real differences between paint and vinyl, and explains why wraps make more sense for high-traffic elevator interiors. What Paint Actually Does to an Elevator Paint feels like the obvious fix. It is cheap upfront and covers the visible wear. But elevator interiors are not like walls in an office or a hotel corridor. The surfaces inside an elevator cab are constantly touched, bumped, and scraped. Paint chips and scuffs under these conditions. It also takes time to dry and cure properly, which means your elevator stays out of service longer than most building managers can afford. Once it starts to show wear, the only fix is to repaint the whole thing again. There is also the odor issue. Many standard paints contain VOCs, which can make an elevator unusable for hours after application. In a busy building, that creates real inconvenience for tenants and guests. The cost of repeated touch-ups and lost service time adds up quickly. What Is an Architectural Vinyl Elevator Wrap? An architectural vinyl wrap is a high-grade film applied directly to the existing panels inside an elevator cab. It goes over the surface without removing or replacing anything underneath. The end result looks like a completely fresh interior. Brands like 3M DI-NOC, LG Benif, Reatec, and Belbien produce these films in hundreds of finishes. That includes wood grain, brushed metal, stone textures, solid colors, leather looks, and abstract patterns. The films are precision-cut and applied by certified professionals, with seams that sit at panel edges and are nearly invisible. The wrap goes over what is already there. No demolition, no permits, no mess. The elevator can be back in service the same day. Vinyl vs Paint: A Direct Comparison Here is how the two options sit against each other across the areas that matter most for commercial elevator interiors. Factor Vinyl Wrap Paint Durability 7 to 12 years with abrasion resistance Chips and scuffs within months in high-traffic use Installation Time Around 5 hours per cab Multiple coats plus drying and curing time Building Downtime Same-day return to service Hours to days depending on prep and coats Finish Options Wood, metal, stone, leather, solid, fabric, abstract Color only Cost per Cab $5,000 to $10,000 Lower upfront, but recurring repaint costs stack up Fire Rating Class A fire rated, UL 10B and 10C certified Not fire rated to commercial elevator standards VOCs and Odor No harsh odors, no VOCs VOCs common in standard commercial paints Permits Required No No, but building management requirements may vary Environmental Impact Resurfaces existing panels, reduces waste, LEED credits possible No LEED benefit, more frequent material consumption Paint has a lower upfront cost, but that advantage disappears once you factor in the frequency of touch-ups and service interruptions over a few years. Vinyl costs more once but holds up far longer. Where Paint Falls Short in High-Traffic Settings In a low-traffic environment, paint holds up reasonably well. Elevators are a different situation. Hotels like the Hyatt Regency and Four Seasons see their cabs run hundreds of times a day. Corporate towers, hospitals, and residential highrises are no different. Paint cracks and chips at corners and edges first. Those are exactly the spots that get hit most often inside an elevator. Once that starts, the interior looks worn and neglected, even if the rest of the building is in good shape. The impression guests or tenants take away from that matters more than most building managers give it credit for. A scuffed elevator signals that the building is not being looked after. That kind of first impression is hard to walk back. A wrapped interior that still looks clean and solid years later says something completely different. Why Vinyl Works Well in Elevator Cabins The layout of an elevator is well-suited to vinyl wraps. The wall panels are flat or have simple profiles. They are fixed in place. They do not flex or move the way a door would, which means the film does not face the same stress it would on a surface that opens and closes repeatedly. Certified installers measure the cabin and cut the film to fit each panel. The application sits smooth and flat. Seams land at panel edges, which makes them almost undetectable once the job is done. It looks like the panels were produced that way from the start, not covered over afterward. The same elevator cab wrap process can extend to the elevator landing areas. Resurface Wraps also handles elevator landing wraps, which lets you carry a consistent finish from the hallway right into the cab. Who Uses Elevator Vinyl Wraps Elevator wraps work across a wide range of building types and industries. Here is a breakdown of the settings where they are most commonly used. Building Type Why Wraps Work Here Hotels and Hospitality Guests interact with elevators constantly; a fresh interior reflects on the property’s overall standard. Corporate Office Buildings Client-facing spaces need to look maintained; wraps update the interior without disrupting tenants. Healthcare Facilities No VOCs and fire-rated materials meet strict safety and hygiene requirements. Residential Condominiums Common area updates without major assessment costs or construction disruption. Retail and Mixed-Use Properties Updated interiors support the overall feel of the building for both tenants and visitors. Hotels like the Hyatt Regency Brickell have used architectural elevator cab wraps to refresh their